ADMIN MODULE

1 . Login Page

Give valid User Name & Password and login here.

login

2.Administrator Panel

2.1 : Dashboard

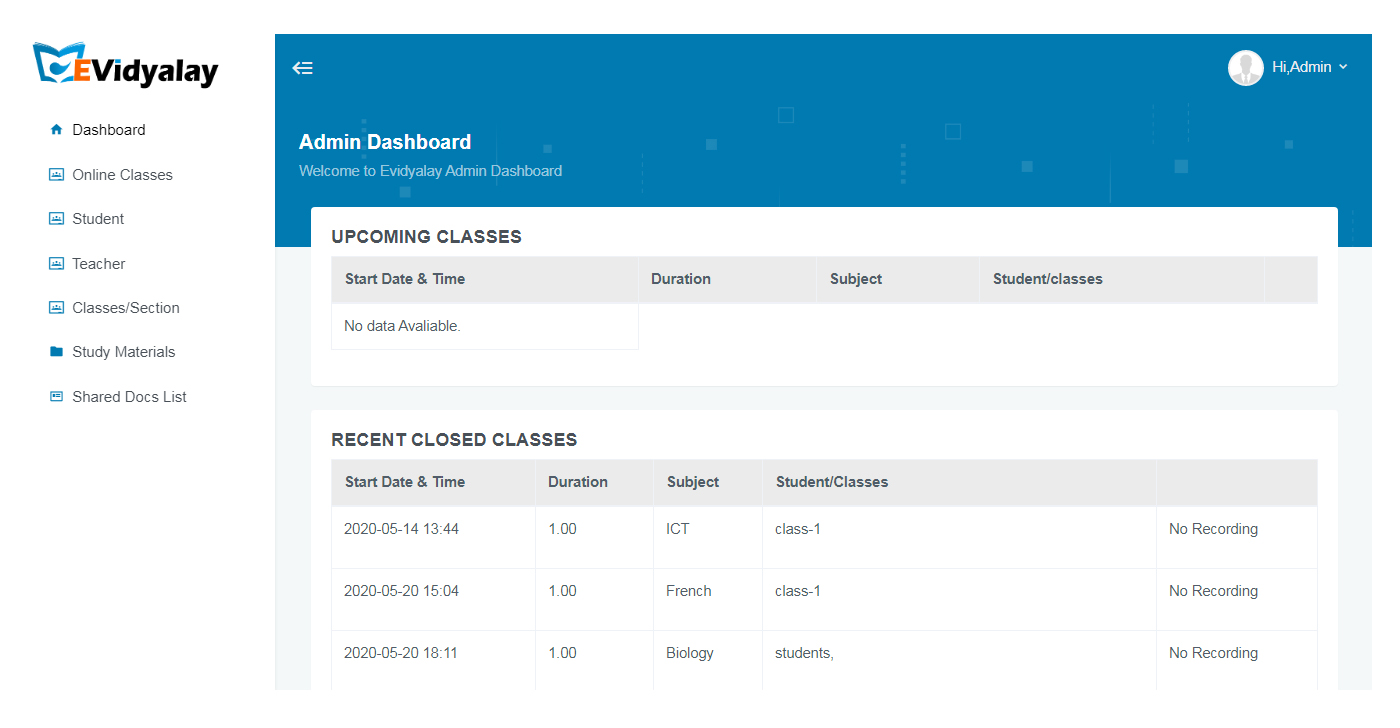
Here you can see all the class schedule.
i.e. Both upcoming class and closed class.

Admin Dashboard

2.2 : Online Classes

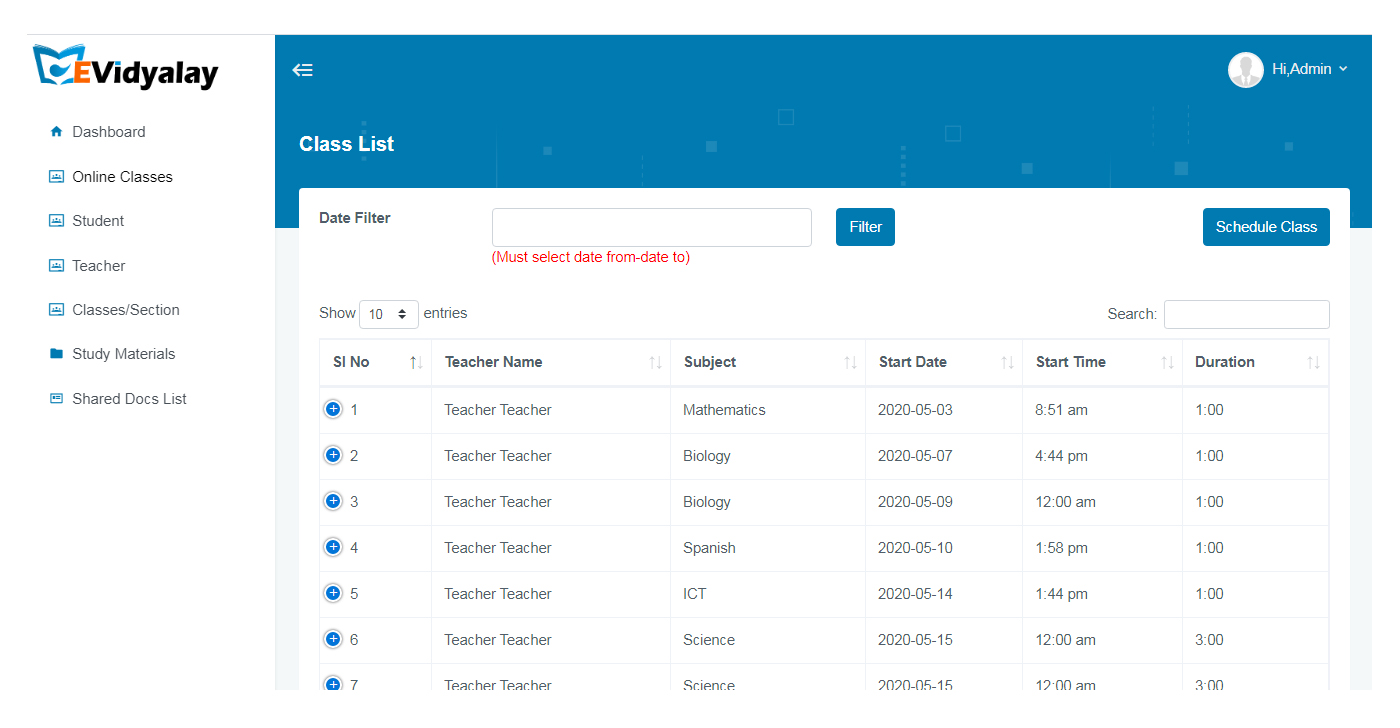
Here you can,
1 – schedule a class by clicking Schedule Class field.
2 – edit the previous scheduled details by clicking the + symbol.
3 – filter the classes according to your requirement

Class List

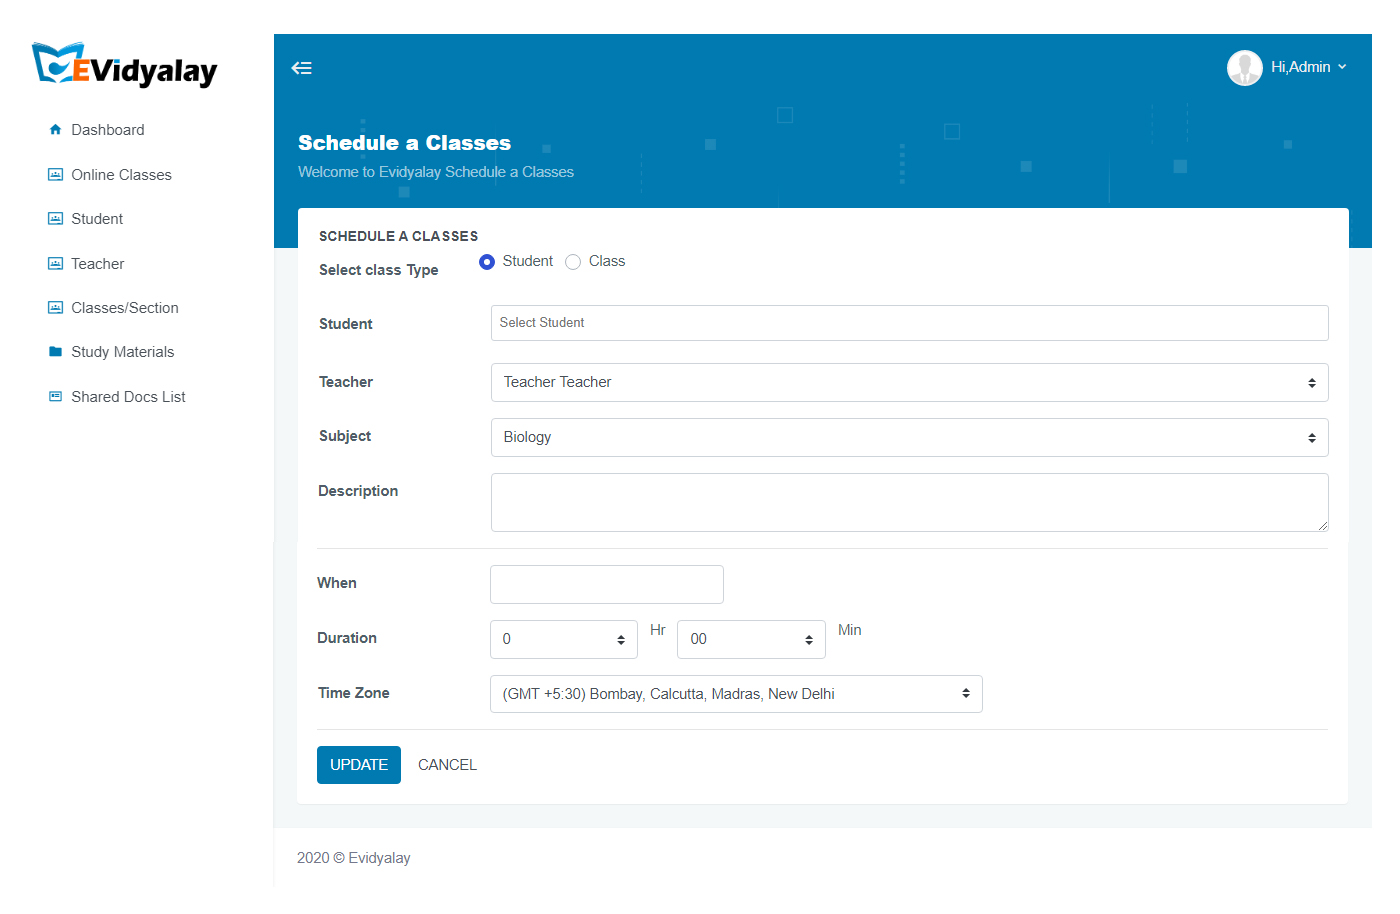
2.2.1 : Schedule classes (For student type)

Here you can schedule a class by selecting individual student name, teacher name, subject name, time and duration.

e.g. a special class or a doubt clearing class for some specific students.

Schedule classes For student type

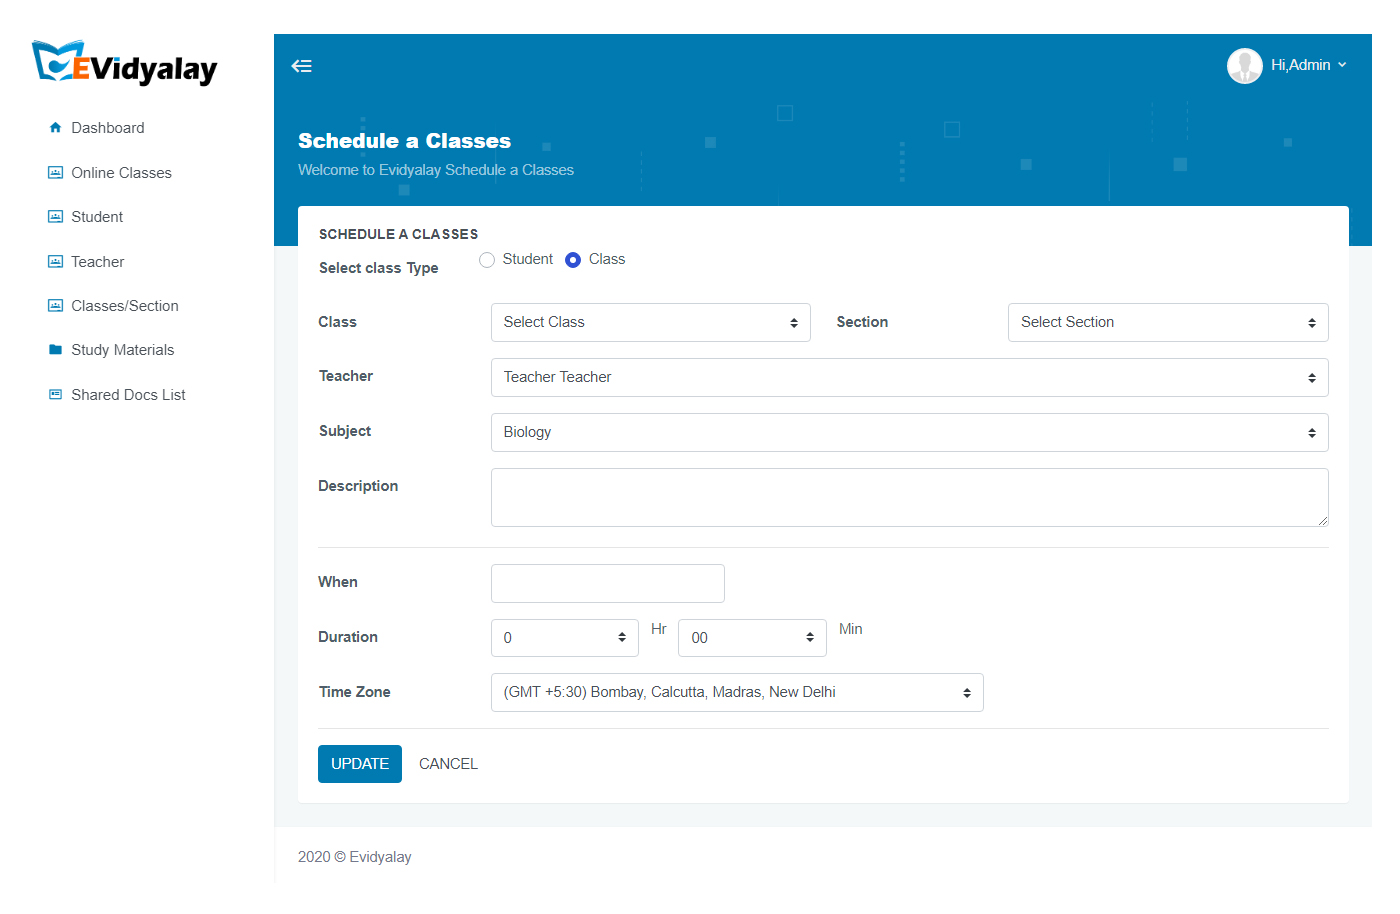
2.2.2: Schedule classes (For class type)

Here you can schedule a class by selecting class and section name, teacher name, subject name, time and duration.

E.g. Class 5 & Sec – A or Class 6 & Sec – B etc…

Schedule classes For class type 2

2.2.3 : Date filter field

Here you can see a class time of a particular date. First select the specific date and then you can see all the classes for the particular date.

Class List

2.3: Student

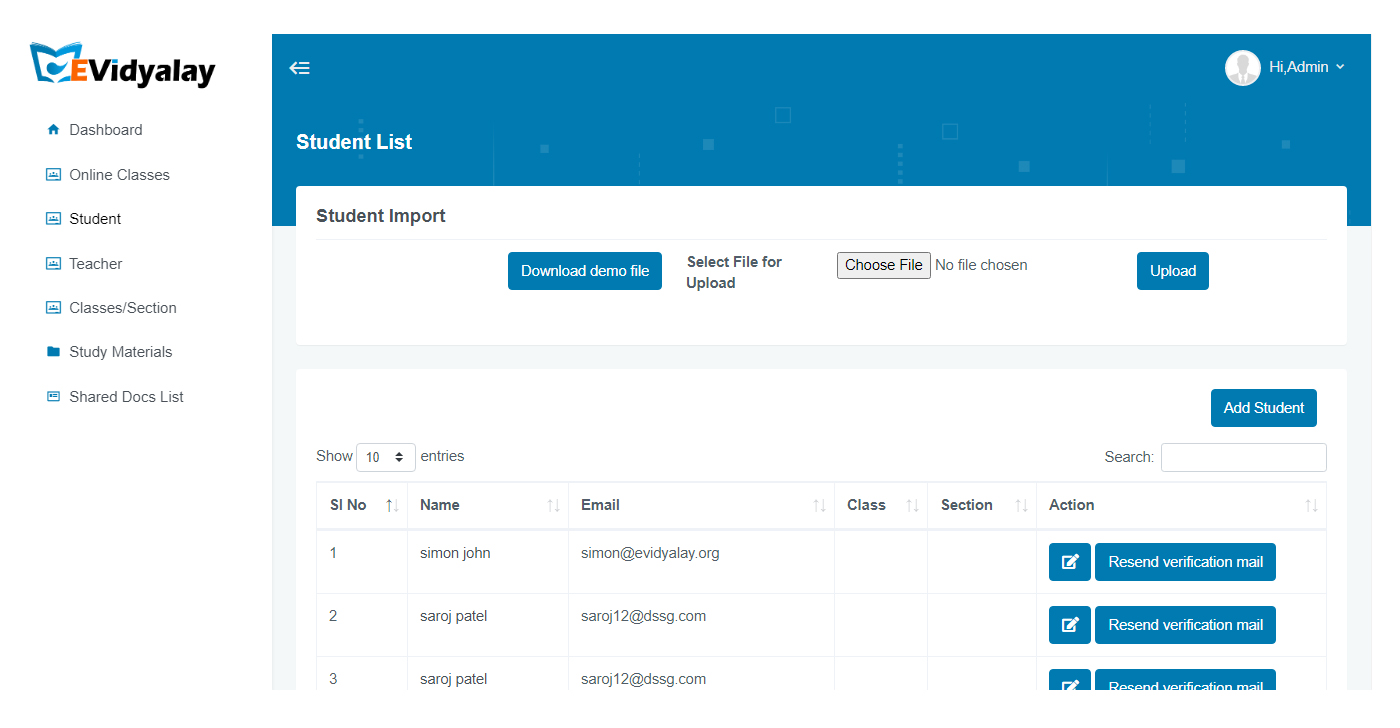
Here you can see all the students list and search for a particular student as well as add/upload new student details.

Student List admin

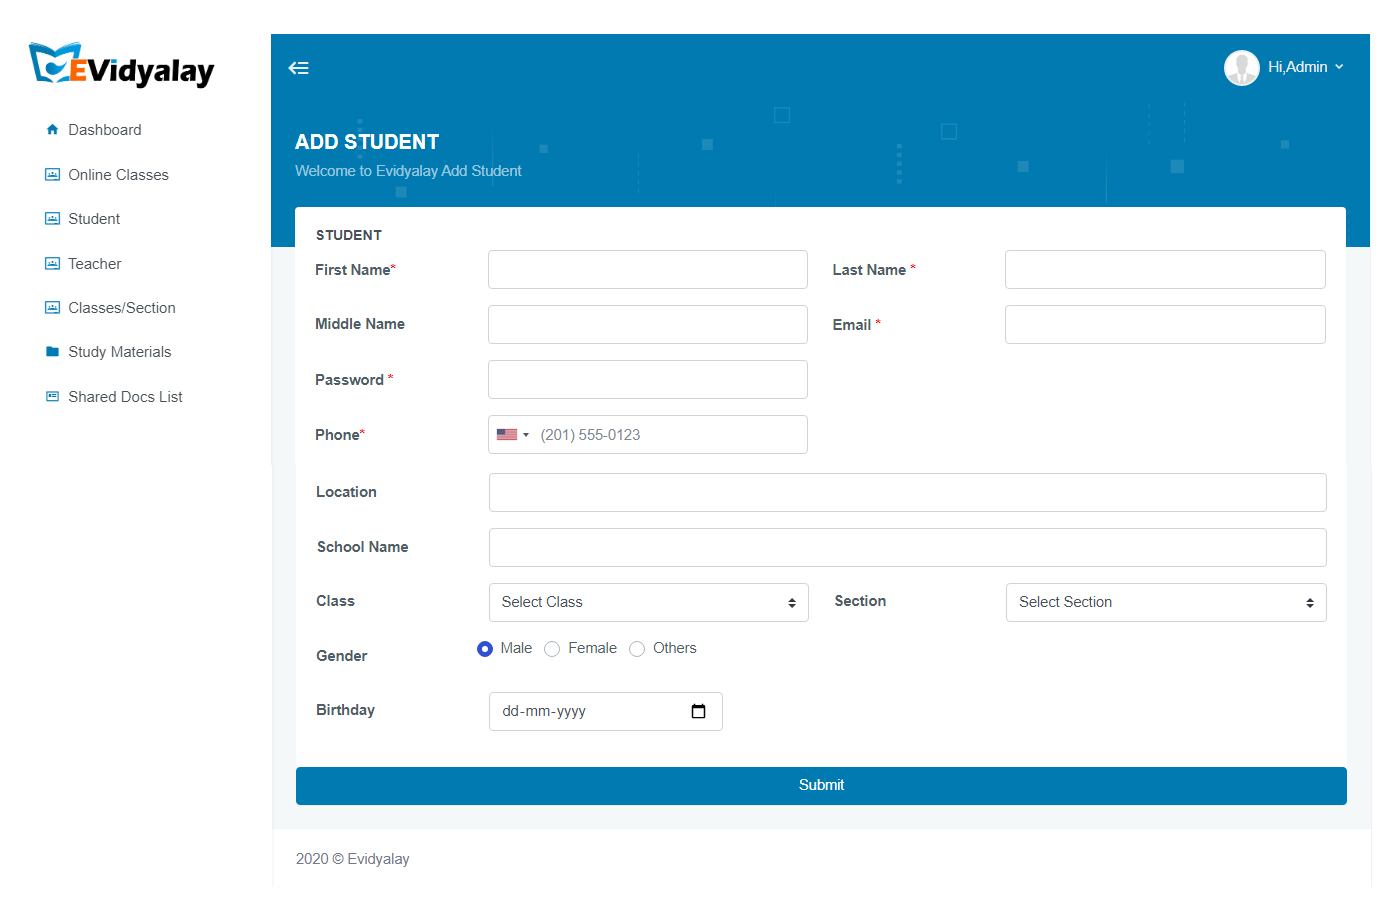
After clicking add student a new page will appear as below, here fill all the credentials and click submit then a new student will be added successfully.

add students admin

2. 4: Teacher

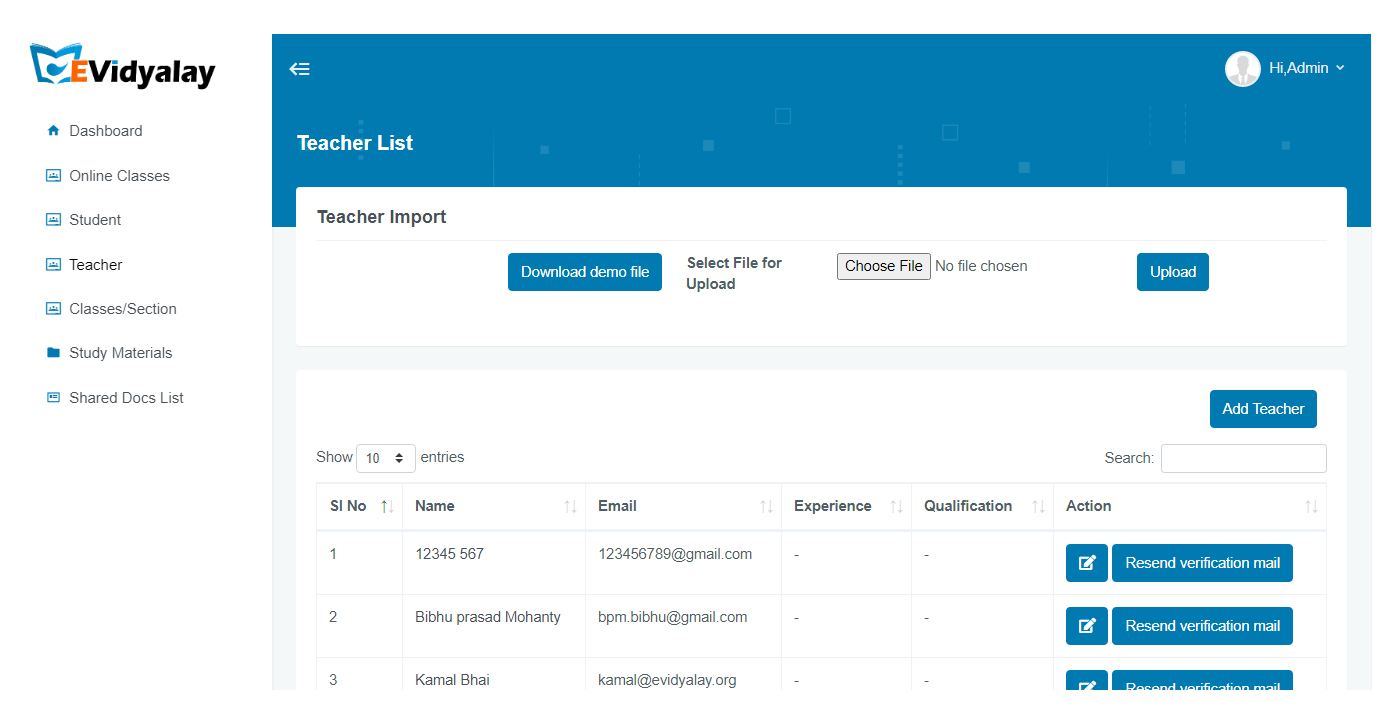
Here you can see all the teacher list and search for a particular teacher as well as add/upload new teacher details.

teacher admin

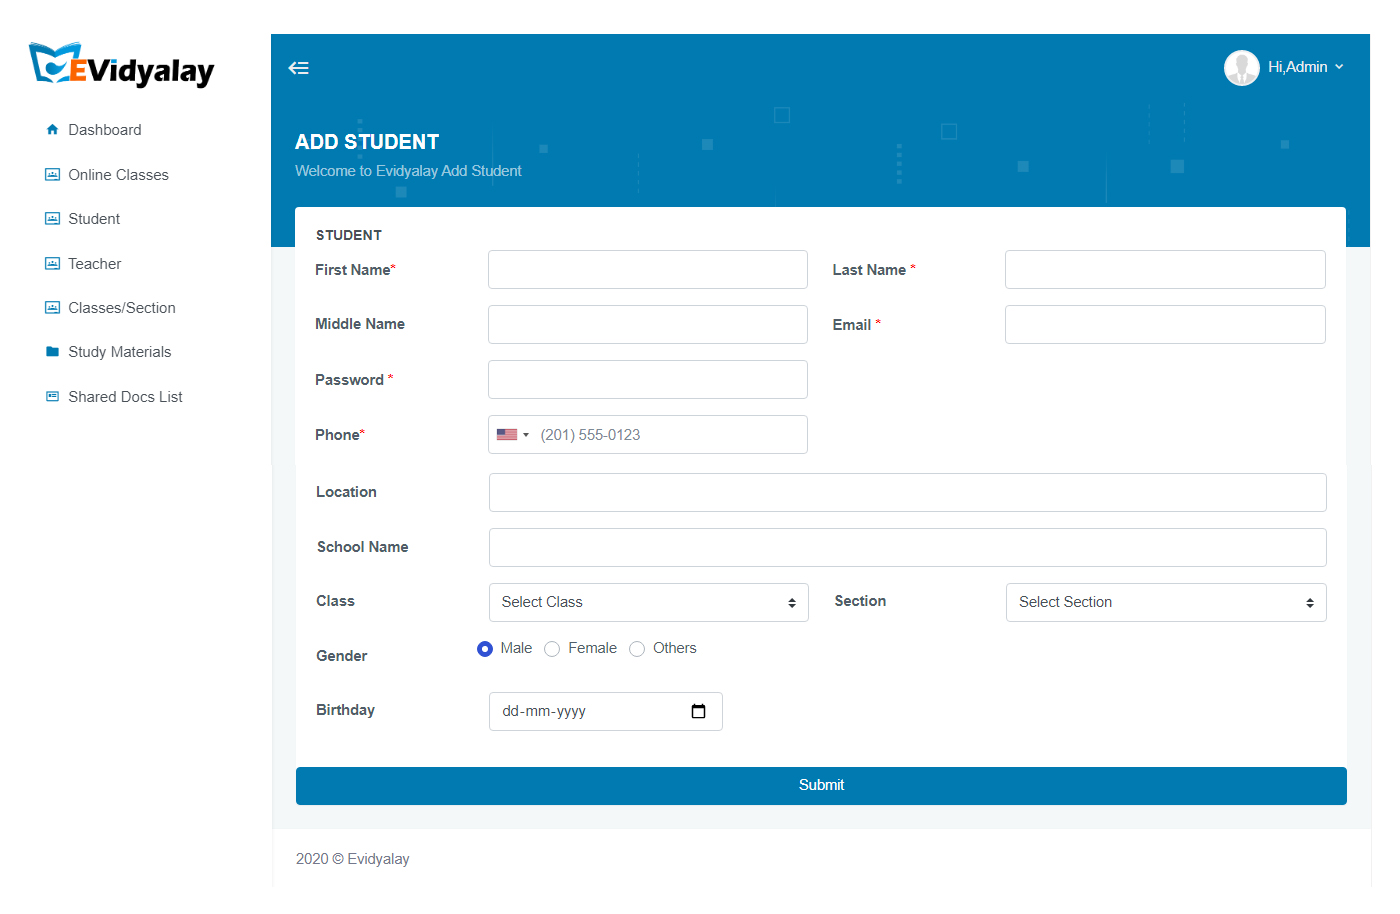
After clicking add teacher a new page will appear as below, here fill all the credentials and click submit then a new teacher will be added successfully.

add students admin 1

2.5: classes/section

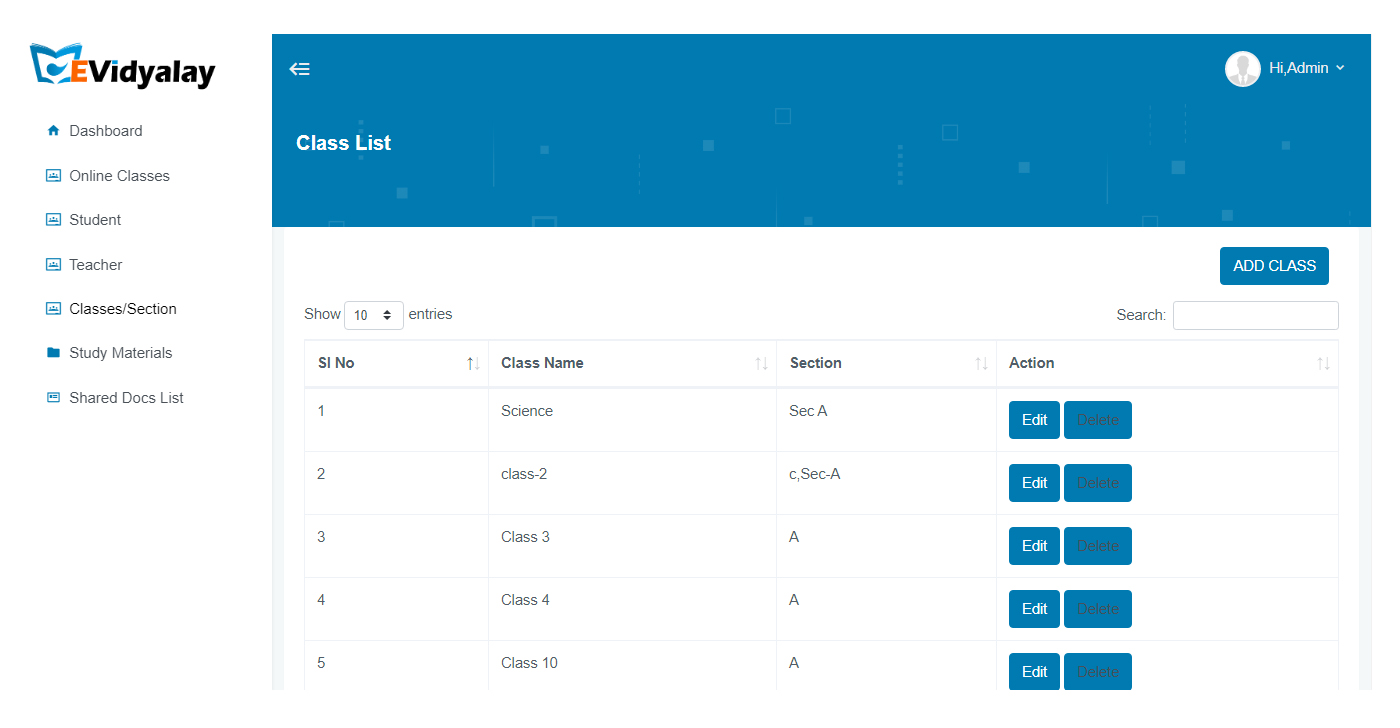
Here you can see class list, search for a particular class, edit a class details and add a new class.

CLASSES admin

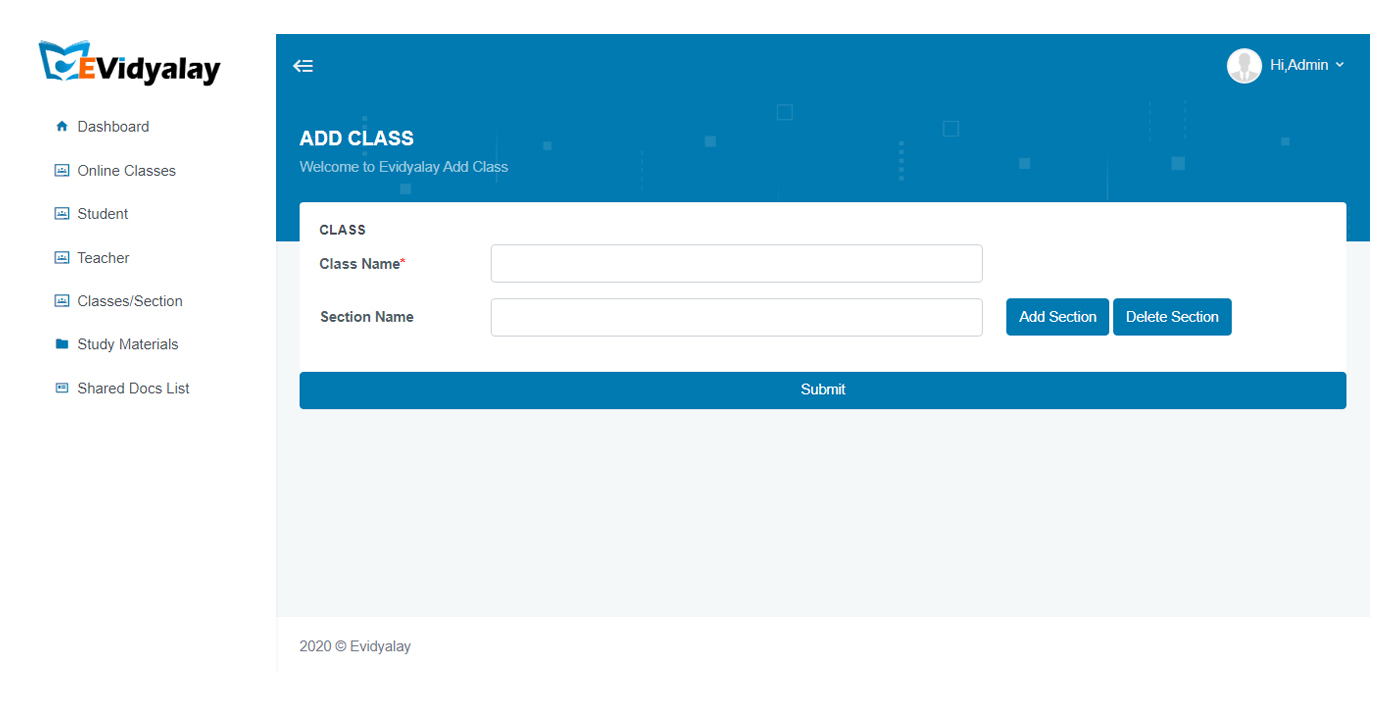
First click on the classes/section link on the left side of dashboard page ,then user can see all the class name and section when user can add the new class then click the add class button.

ADD CLASS admin 2

Give the class name and section name , then click on the submit button.

2.5.1: Edit

Here you can edit an existing class.

edit

2.6: study material

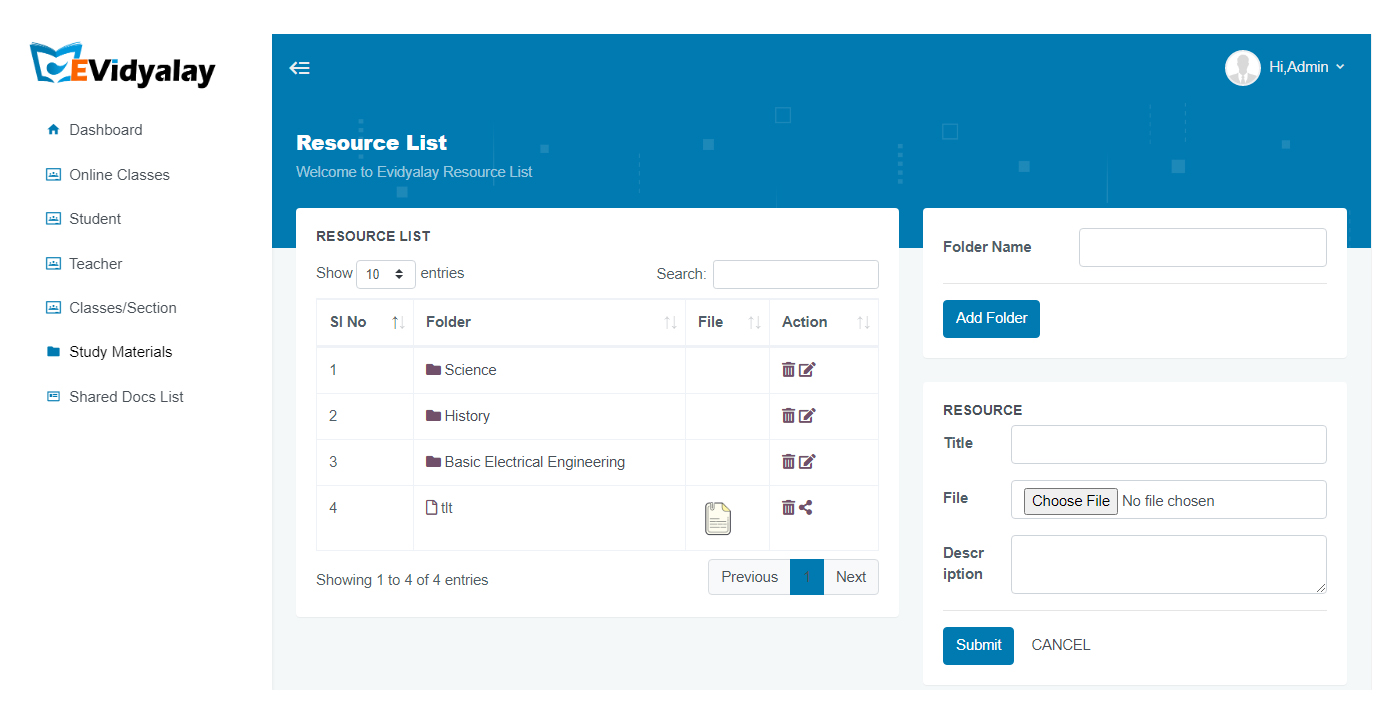
Here you can upload a new study material as well as edit and delete a existing material.
Process- To add a new study material
1st give a Folder Name then click on Add Folder.
2nd Write the Folder Name in Title Section, then choose a file and submit.
Now check in resource list a new study material is added there in resource list.

study material admin

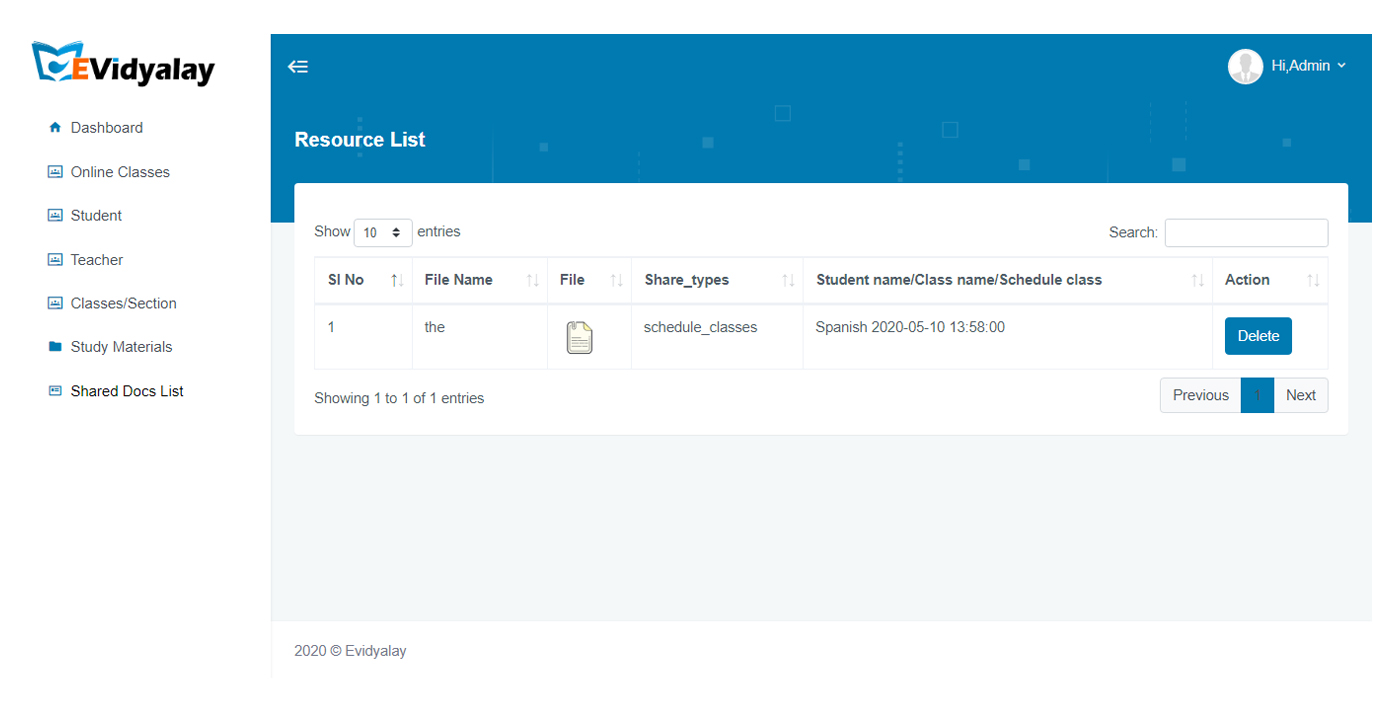
2.6: Shared Docs List

Here you can see and download the shared docs.
Process- Click on the file icon and then save to your system.

Shared Docs List

STUDENT MODULE

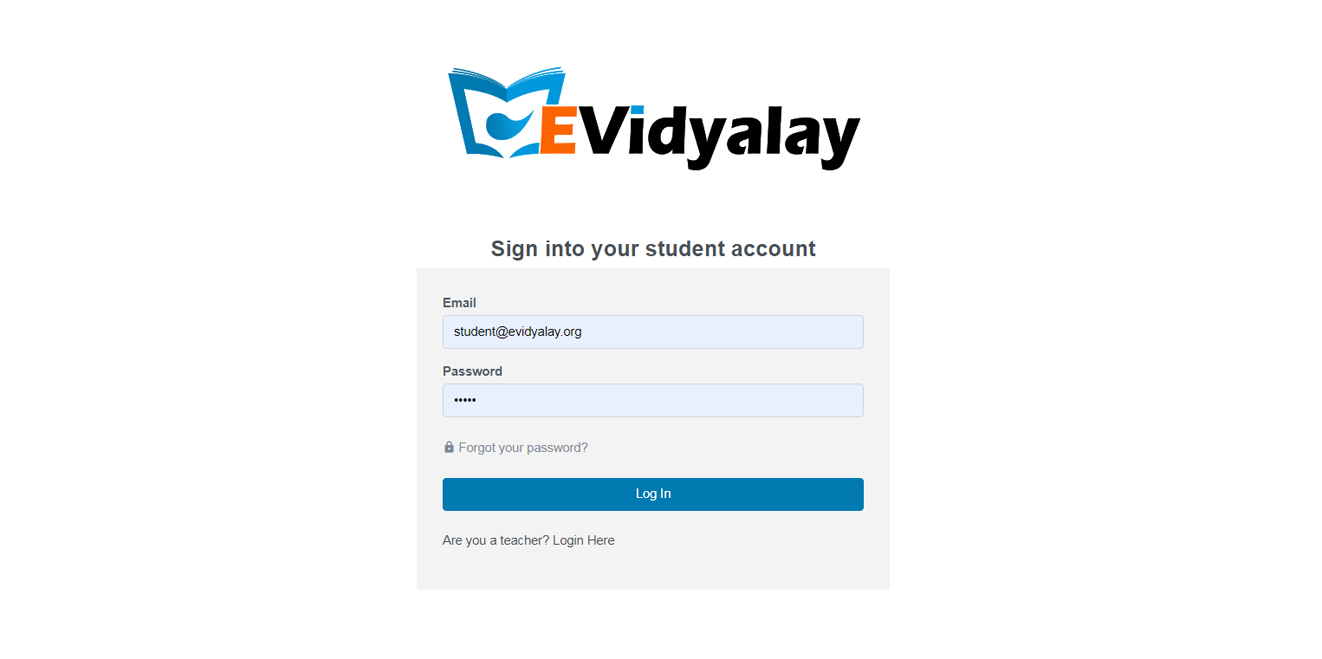
1. Login Page

Here you can see and download the shared docs.
Process- Click on the file icon and then save to your system.

Student login img 1

2. Student Panel

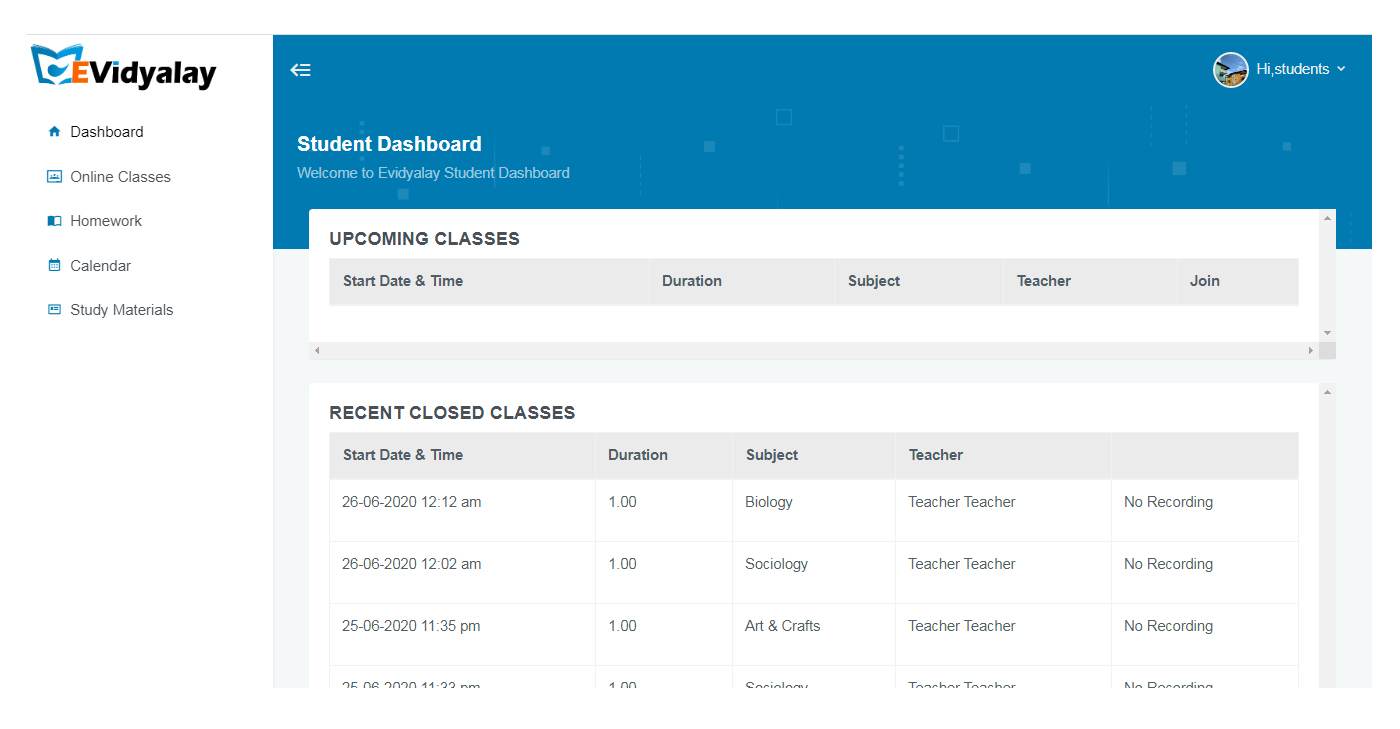
2.1 Dashboard

Here a student can join into virtual classroom by clicking join button of respective classes.

DASHBOARD

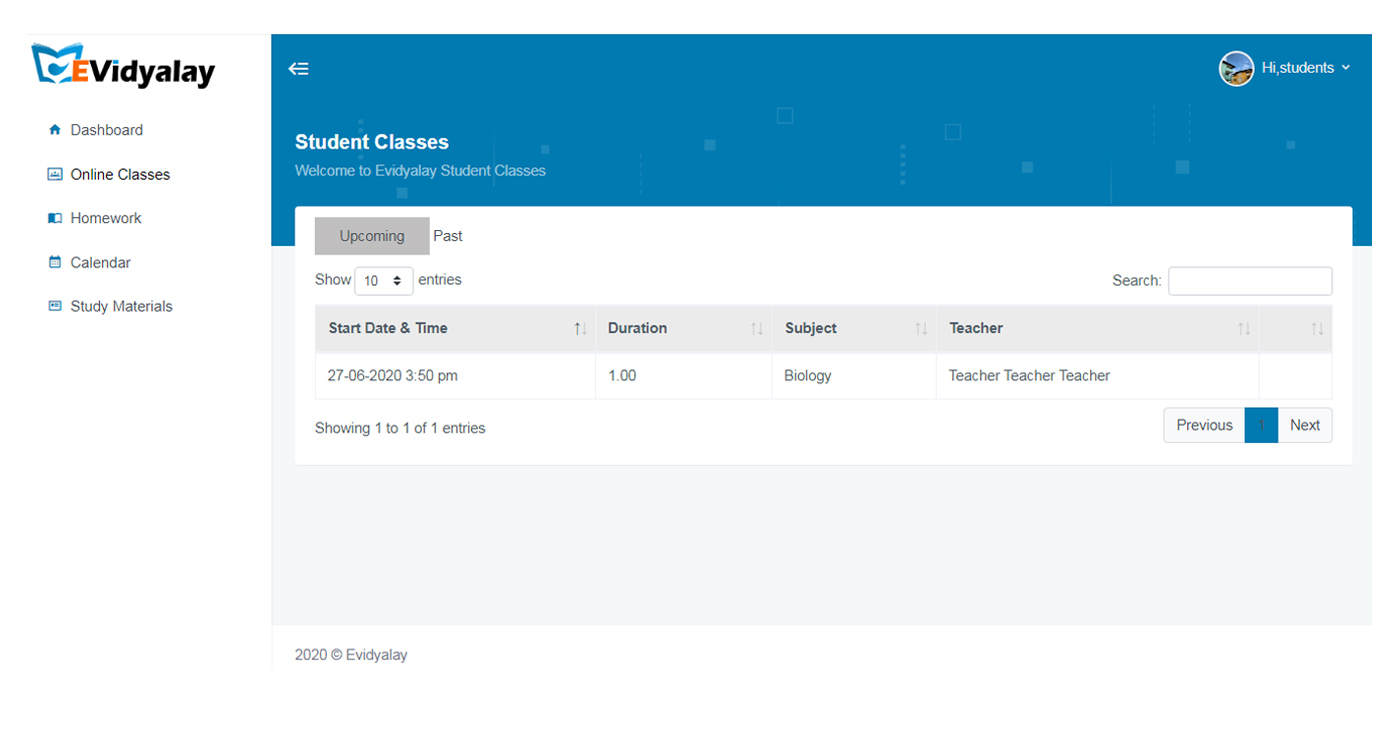
2.2. online class (upcoming)

The user clicks the online classes’ link in the left side of dashboard page .Then you see the upcoming class time, date, subject, duration and teacher name and can join it.

online class upcoming

2.3.online class (past)

The user clicks on the online class link in the left side of dashboard page. You see the past button and click this button then you see the past class time, date, duration, subject and teacher name and download the board.

online class past

2.3.1. Download Board

The user clicks on the past button and see the download board button in the right side of online class page. Then click on the download board button and download the file.

online class past

2.4 Home Work

First click on the homework link in the left side of dashboard page .then you see which date class was started, time, subject and submission date.

homework

2.5 Calendar

Here a student can see the upcoming class time and date.

calendar

First click on the calendar link in the left side of dashboard page. Then you will see the next class time and date.

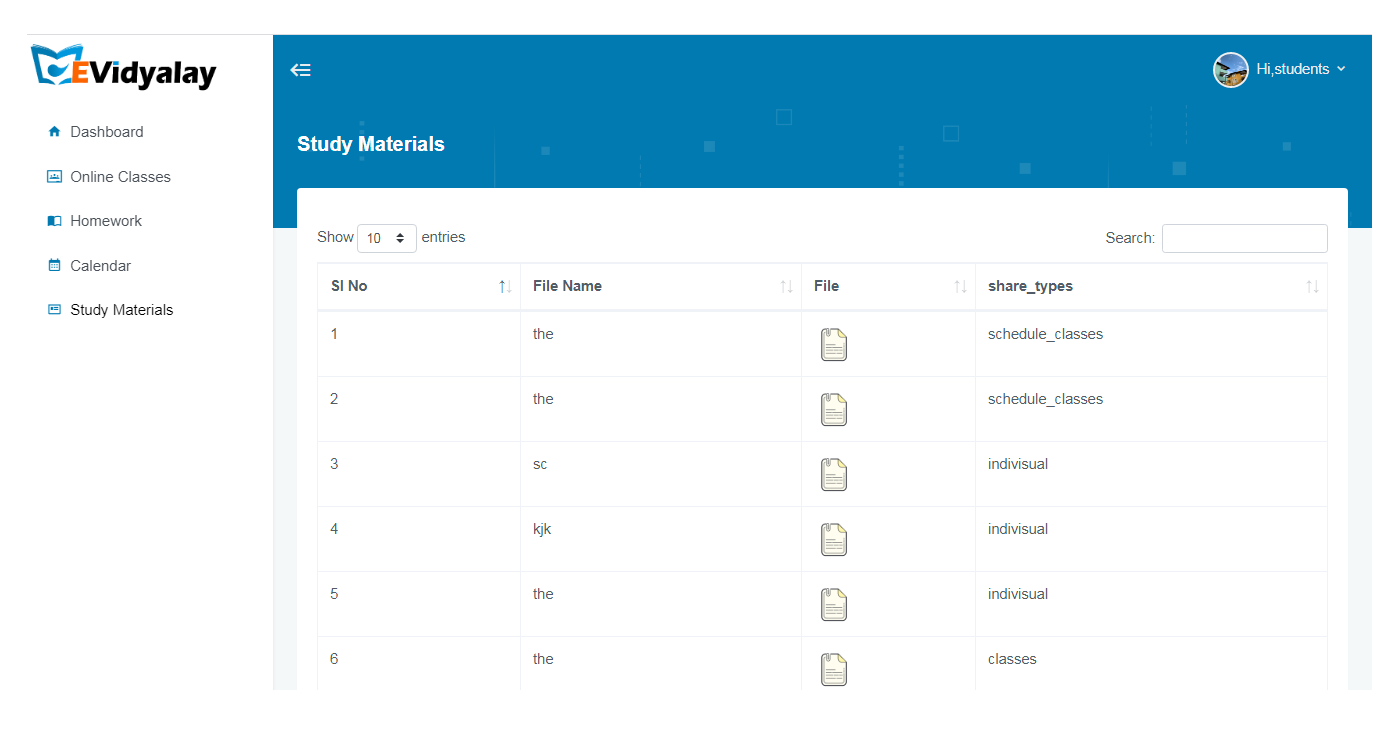
2.6. Study Materials

Here a student can see the upcoming class time and date.

study materials

TEACHER MODULE

1. Login Page

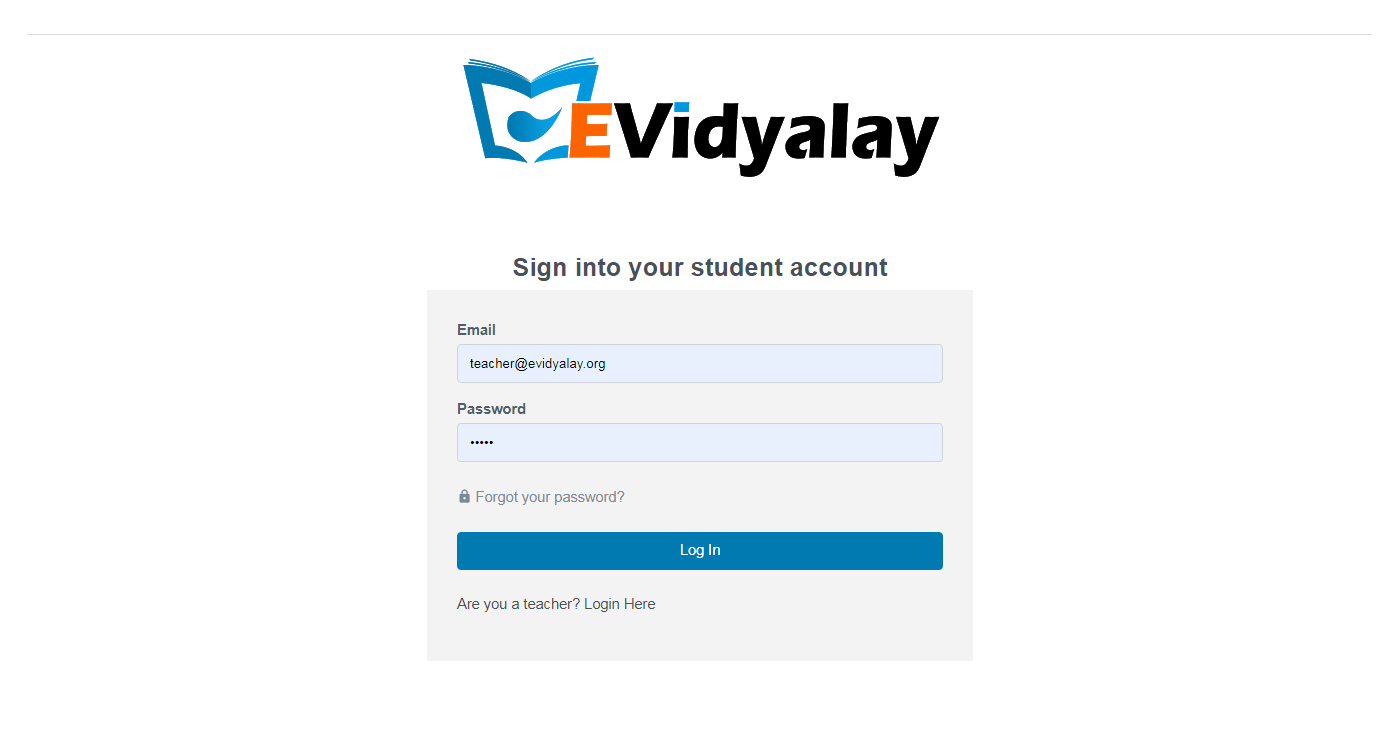
Sign in using teacher’s email id and password.

login teacher

2. Teacher Panel

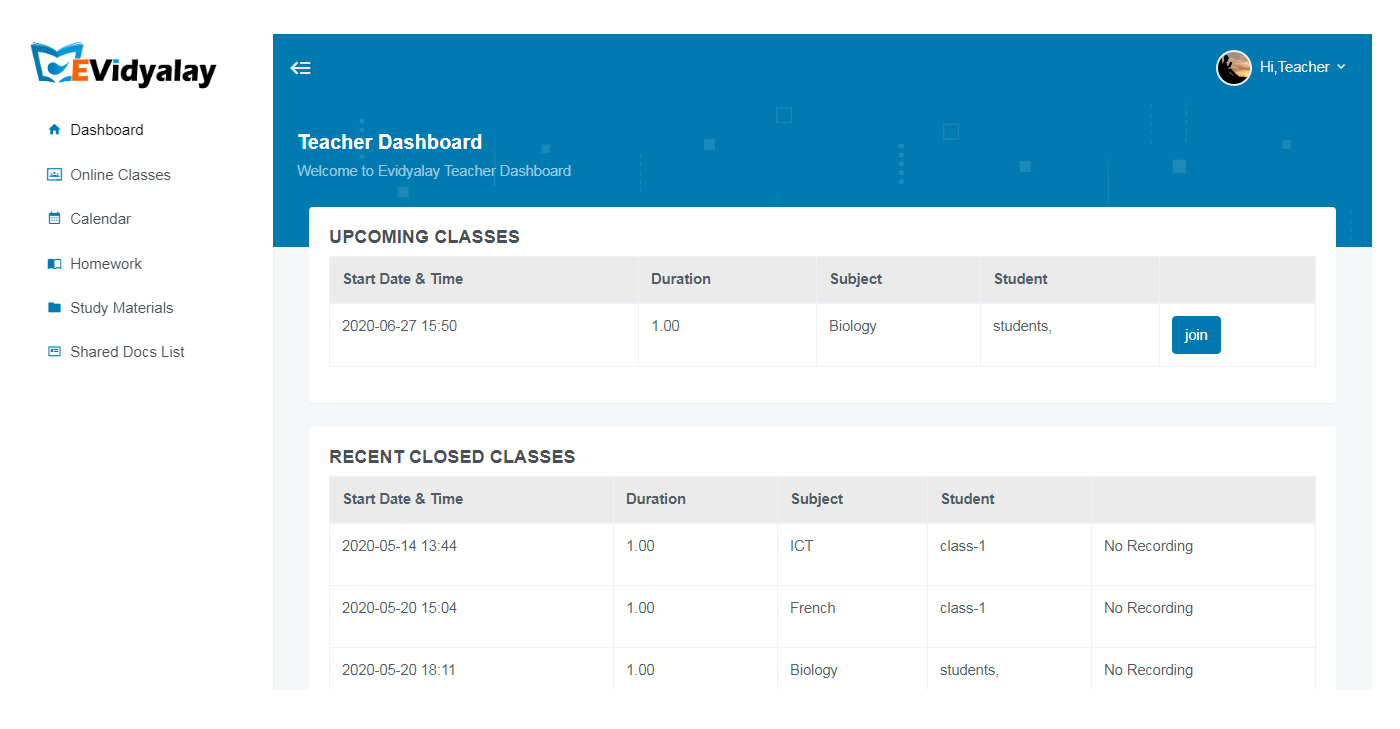
2.1 Dashboard

Here you can see the upcoming class list and can join it. Also see the recent closed classes and can download the board.

teacher das

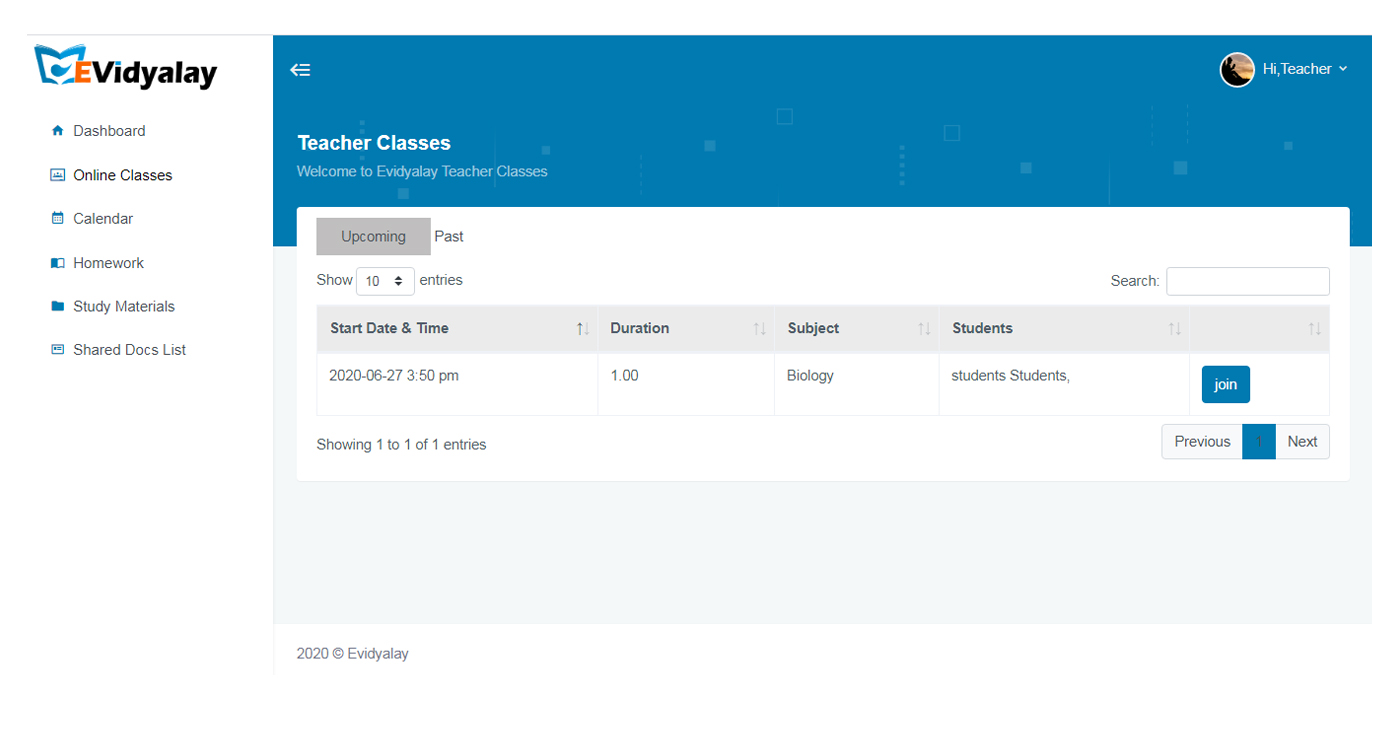
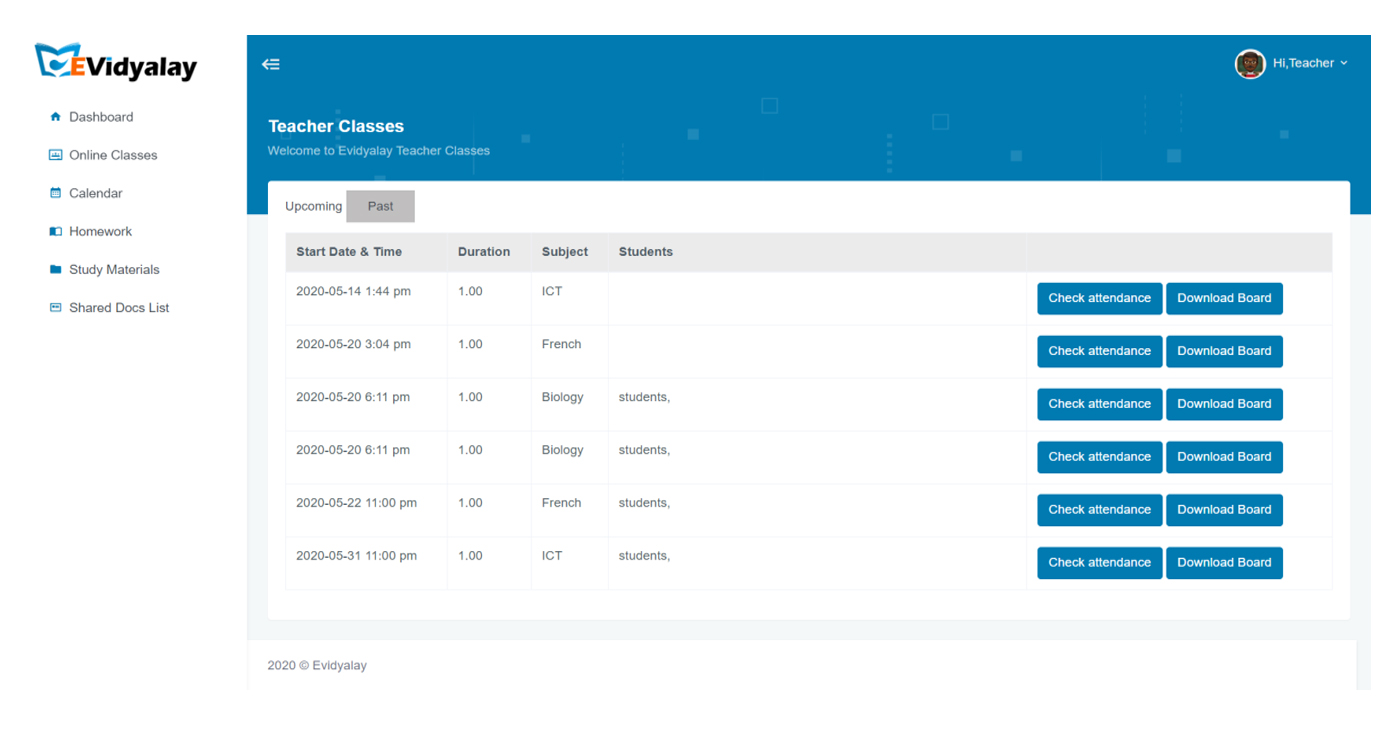
2.2. online class (upcoming)

Here you can see the upcoming classes and can join.The

Teacher Classesupcoming

The user clicks the online classes link in the left side of dashboard page .Then you see the upcoming class time, date, subject, duration and student name.

2.3.online class (past)

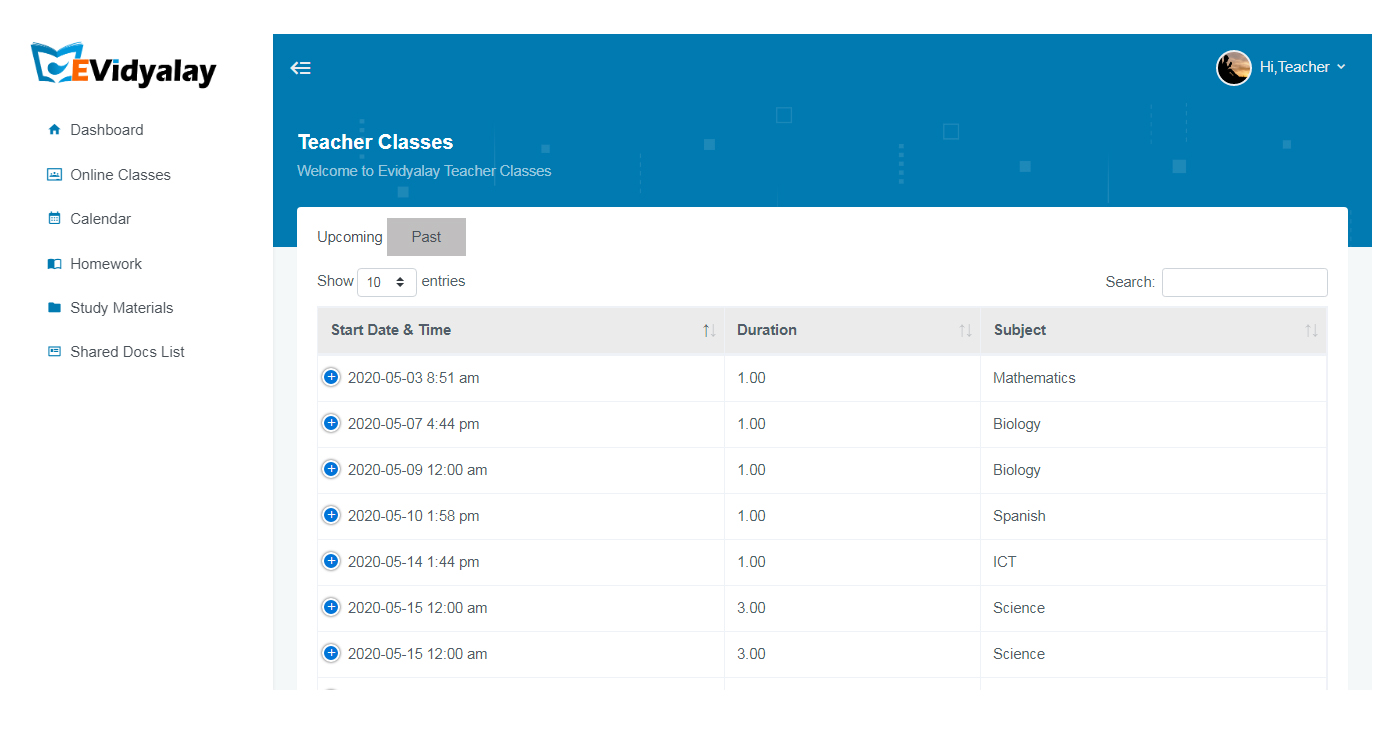
Here you can see the past classes details, can check the attendance and can download the board.

Teacher Classespast

The user clicks on the online class link in the left side of dashboard page, then click on the past field and see the past class time, date, duration, subject and student name.

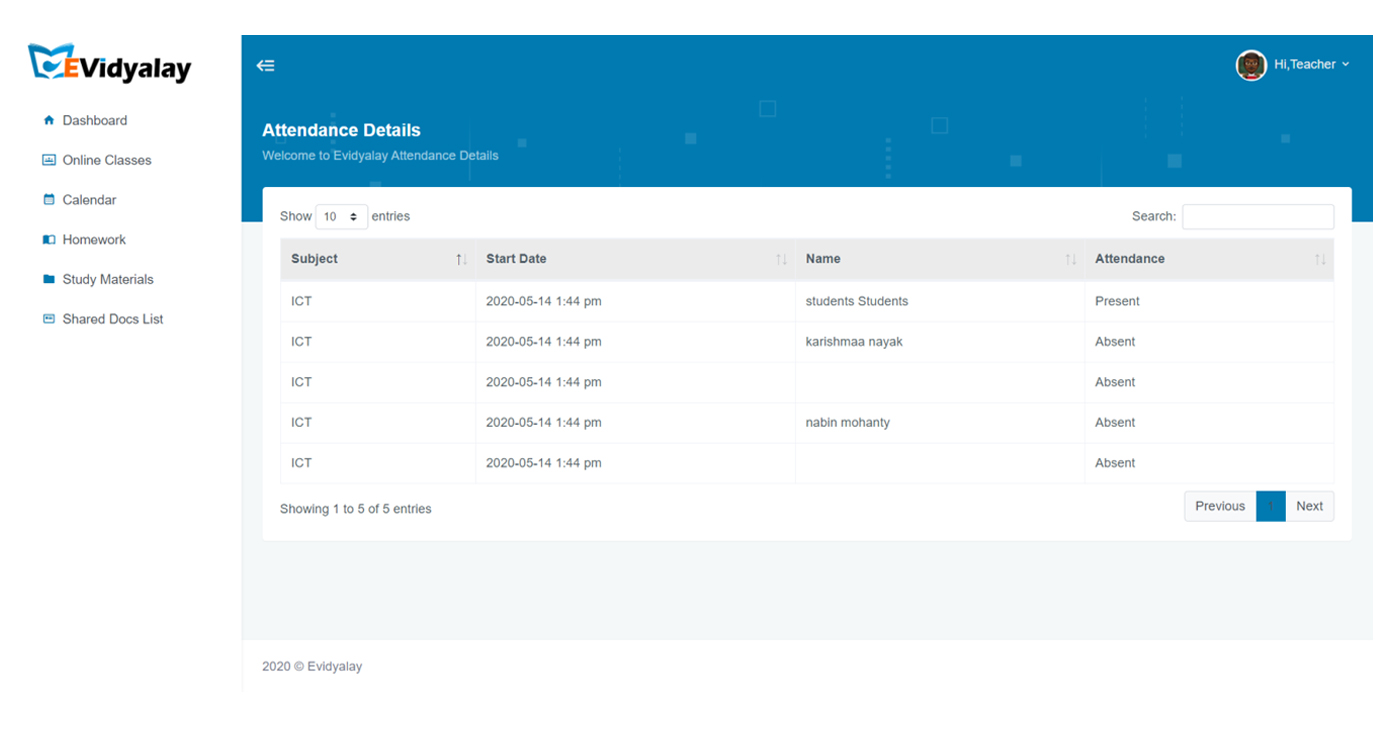
2.3.1: Check attendance

Here you can check the attendance status of individual students.

Check attendance

The user 1st clicks on the past button and then click on the check attendance button and see the subject, date, student name and who is present and absent.

2.3.2: Download Board

Here you can download the board file.

Download Board

The user clicks on the past button, then clicks on the download board button and downloads the file.

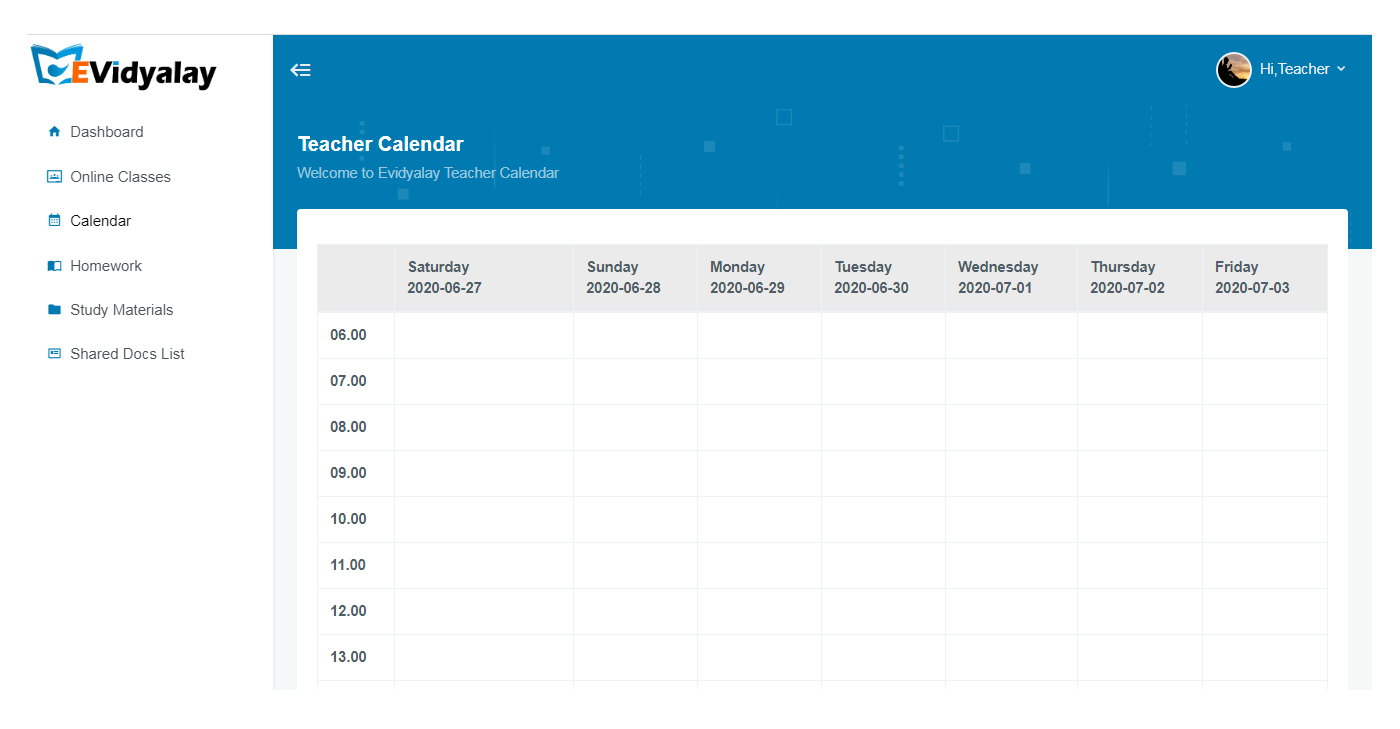
2.5 Calendar

Here a teacher can see the day wise class details of a academic year.

Teacher Calendar

First click on the calendar link in the left side of dashboard page, hen you will see the next class time and date.

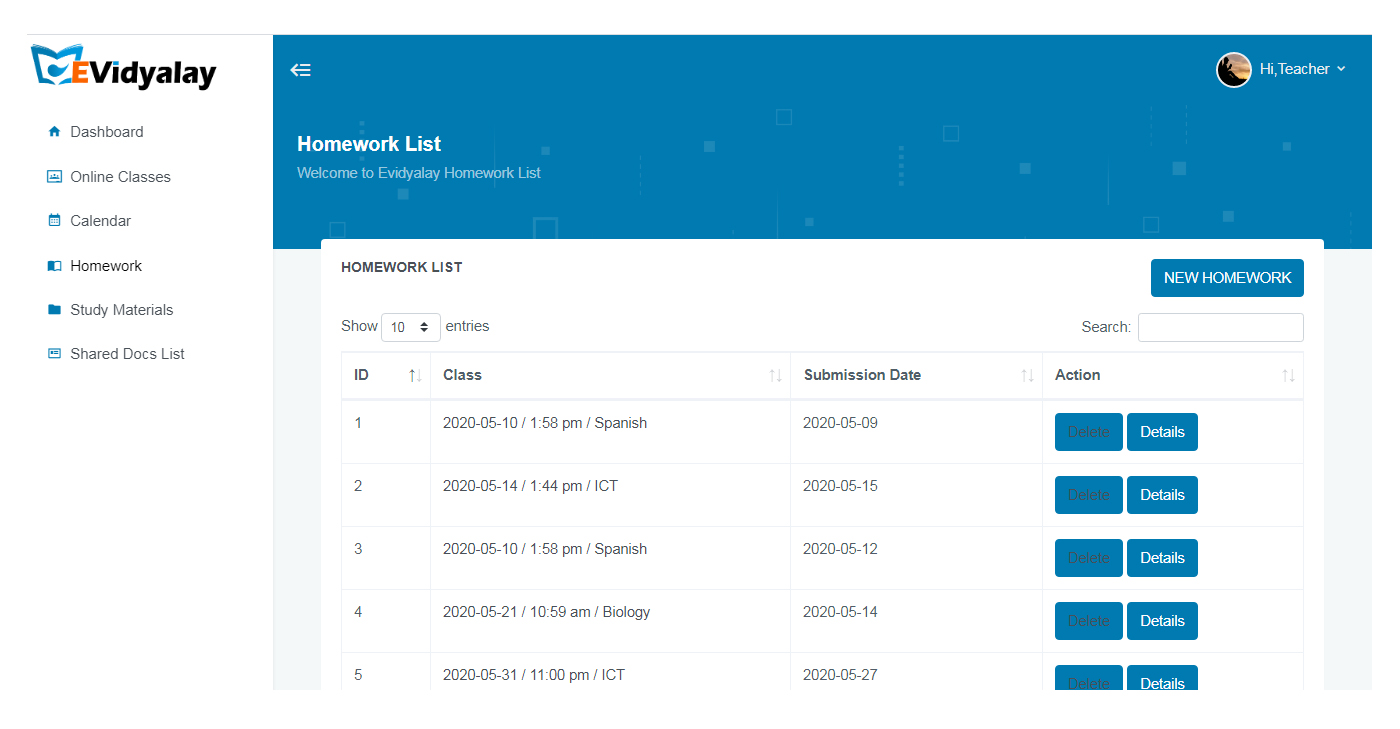
2.4 Home Work

Here you can check the given homework list.

Homework List teacher

First click on the homework link in the left side of dashboard page, then you can see which date class was started, time, subject and submission date.

2.5.1: New Home work

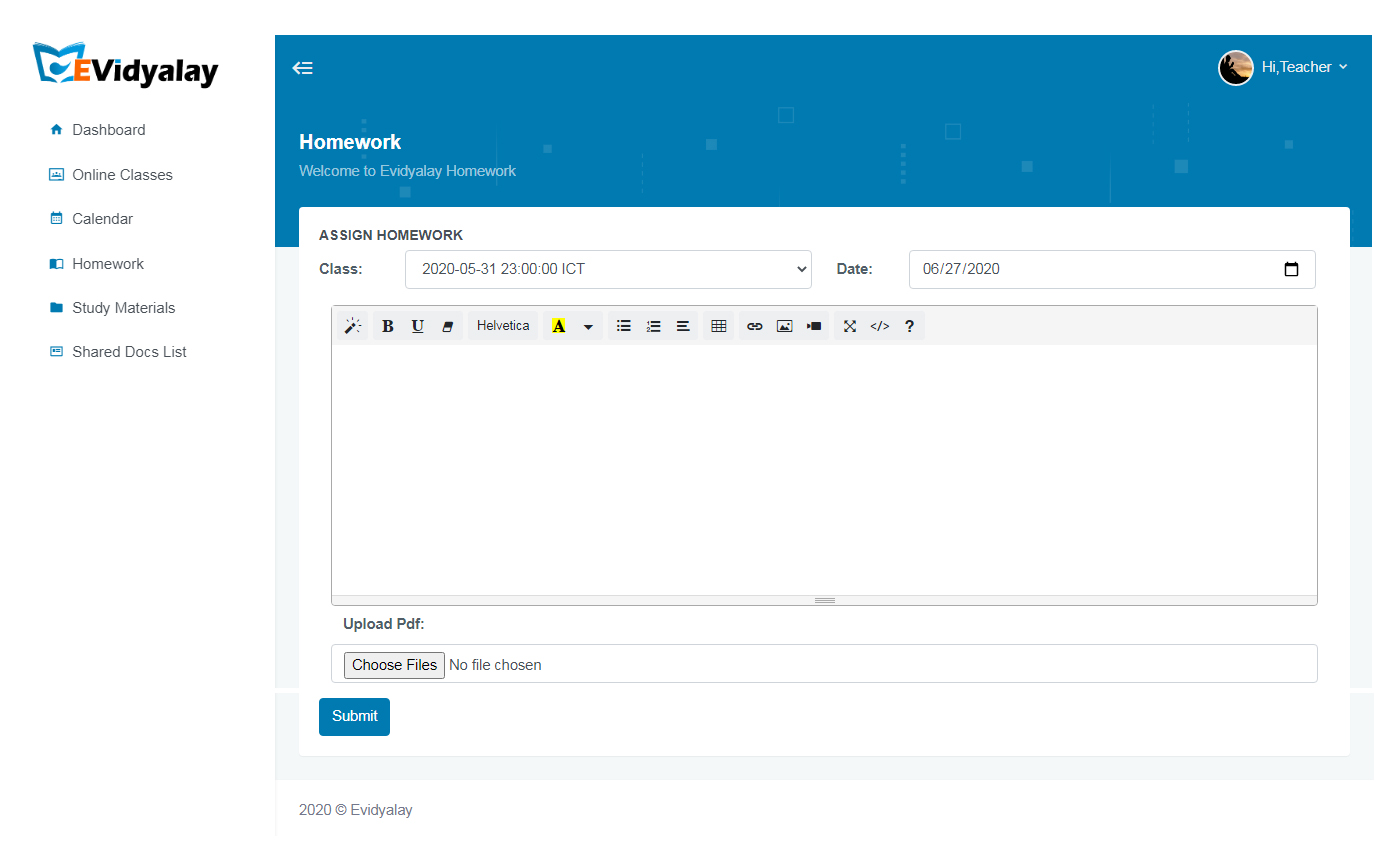
Here you can assign a new homework.

New Home work

First the user clicks on the new homework button in the right side of homework page, then you fill up the class, submission date, upload the homework file and click on the submit button.

2.7. study materials

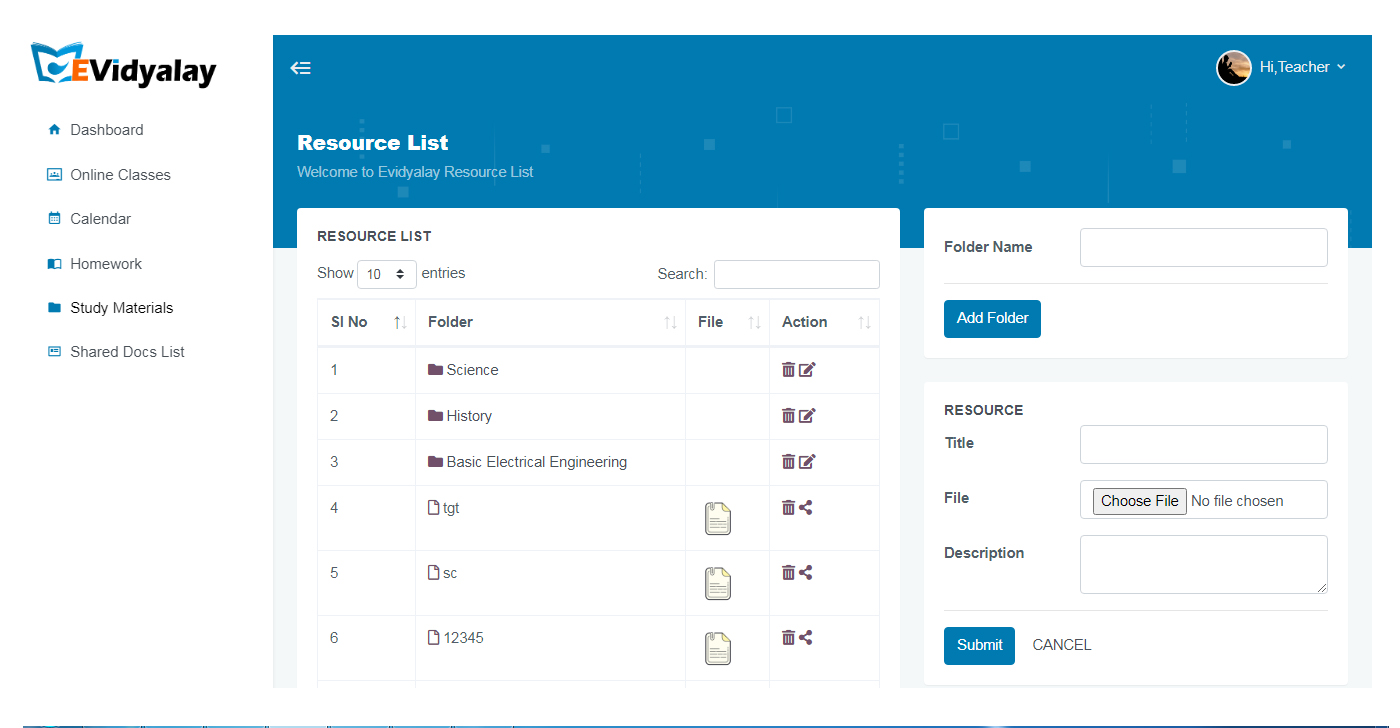
Here you can upload new study materials.

Resource List

First the user clicks the study materials link in the left side of dashboard page. When user want to add a new resource, then fill the title, upload the file, write some description and then click the submit button, a new resource will be added in the resource list.

2.7. Shared Docs List

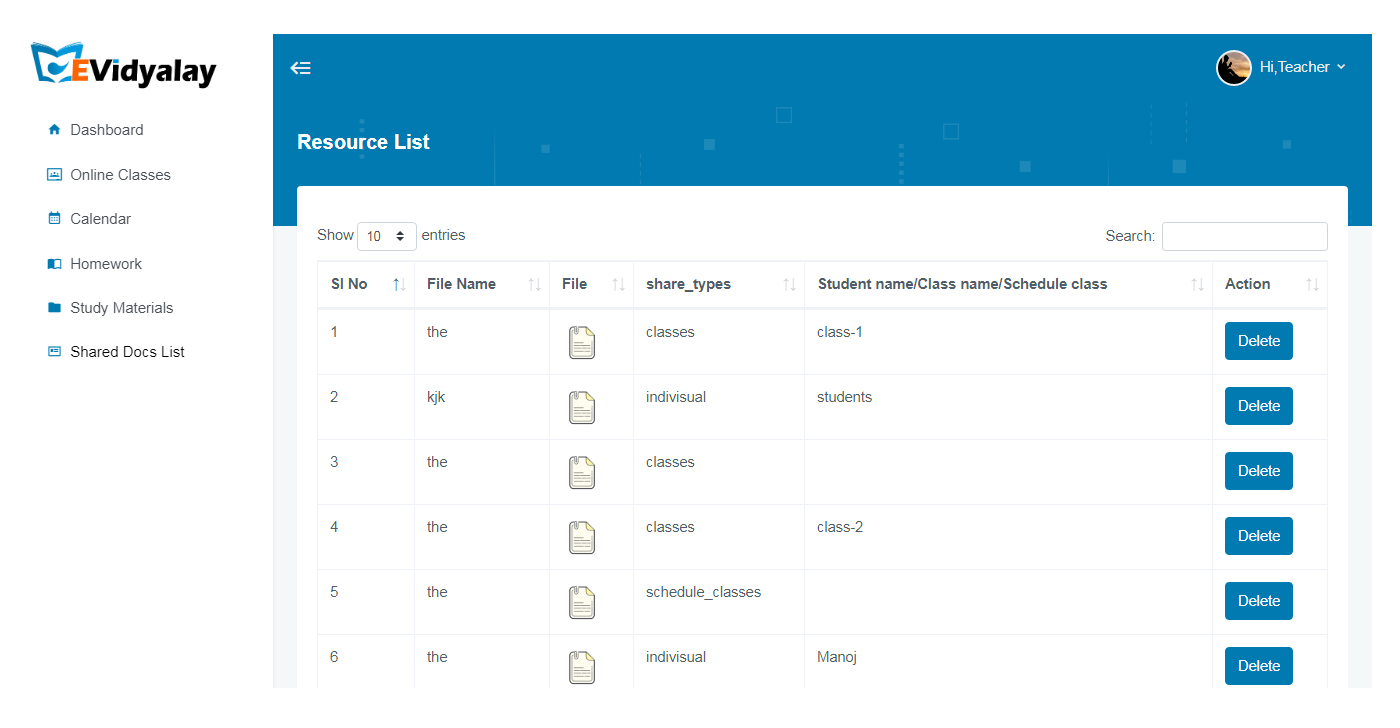
Here you share documents as well as download shared doc, also delete unwanted docs.

SHARED DOCS LIST TEACHER

2.8. Virtual Classroom

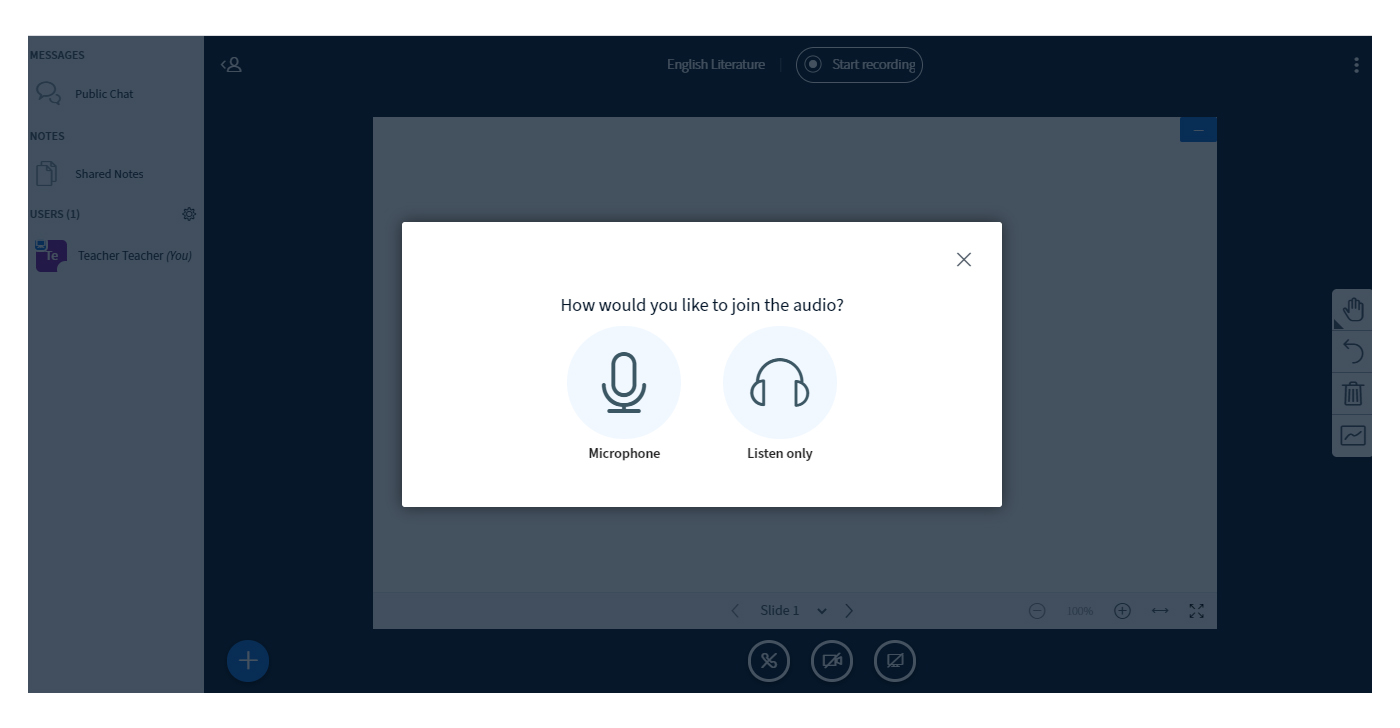
After clicking join button in dashboard, it will redirect you to virtual class room page.

Join Audio:

Join Audio

To use your microphone during the class, click the Microphone icon. To join the conference without enabling a microphone, click the Listen only icon.

View Chrome Microphone Permissions:

Join Audio

To enable a microphone in a Chrome browser, click the Allow button.

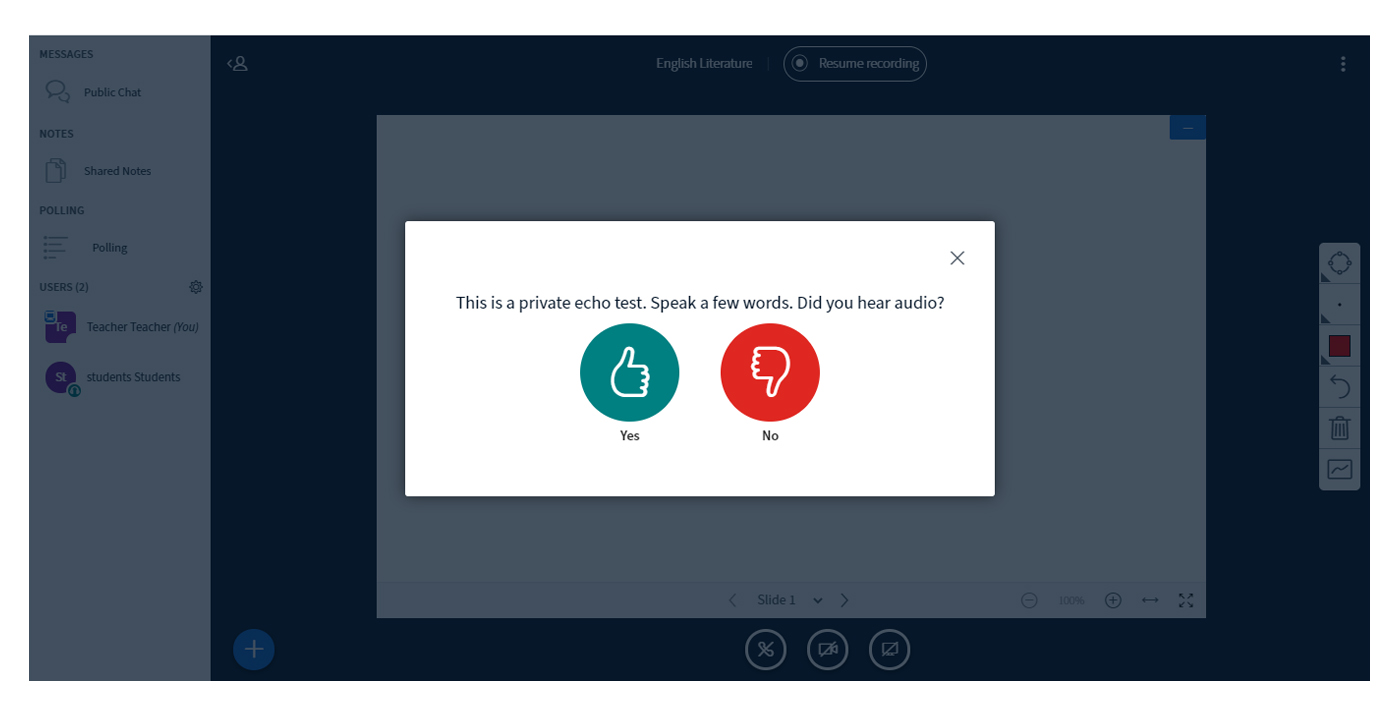
Audio Test :

AUDIO TEST

To ensure your audio is working correctly, complete the private audio echo test.
Speak a few words and if you hear audio, click the Yes icon [1].
To choose a different microphone and repeat the audio test, click the No icon [2].
Note: It is recommended that you use a headset with a microphone for best audio experience.

View Virtual Classroom Interface

Classroom Interface

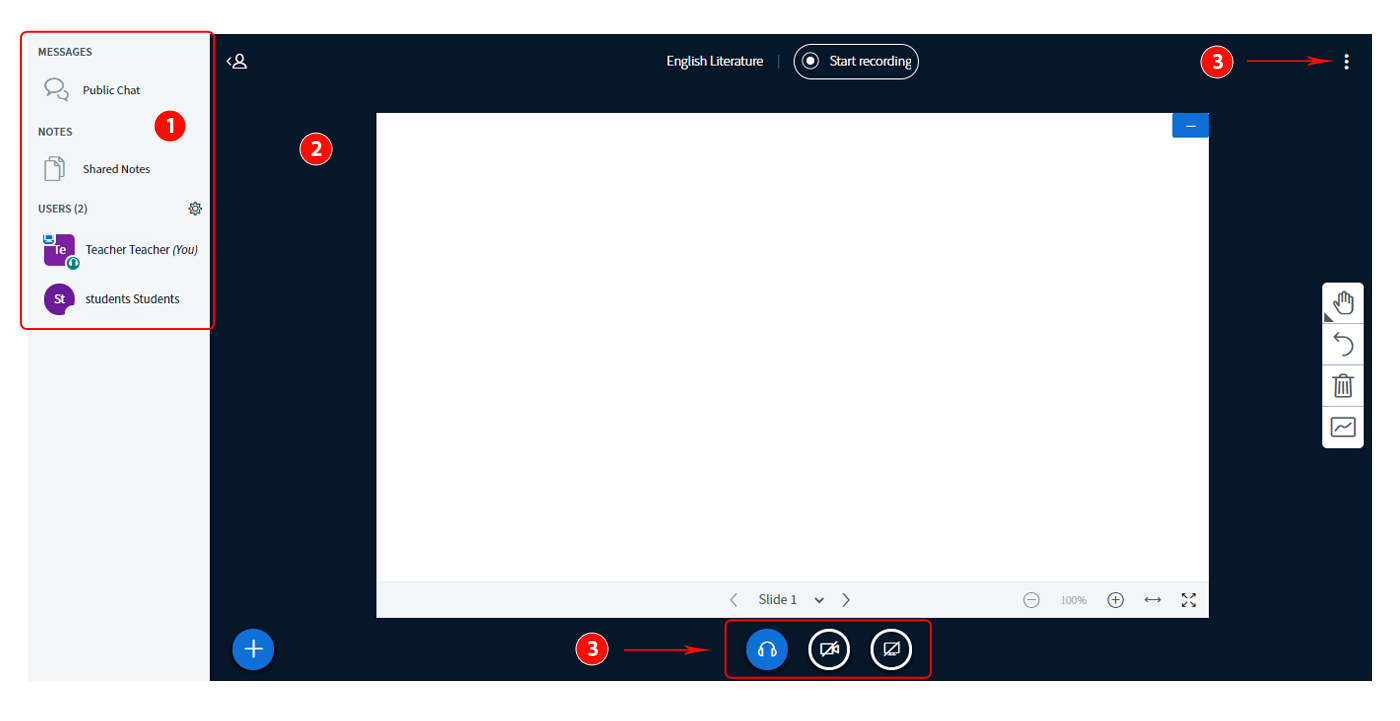
The Virtual classroom interface contains a variety of tools to help you moderate and participate in your presentation. The interface consists of the following areas:
• User Menu [1]
• Presentation Window/White Board [2]
• Conference Tools [3]
• Options Menu [4]

View User Menu From

View User Menu

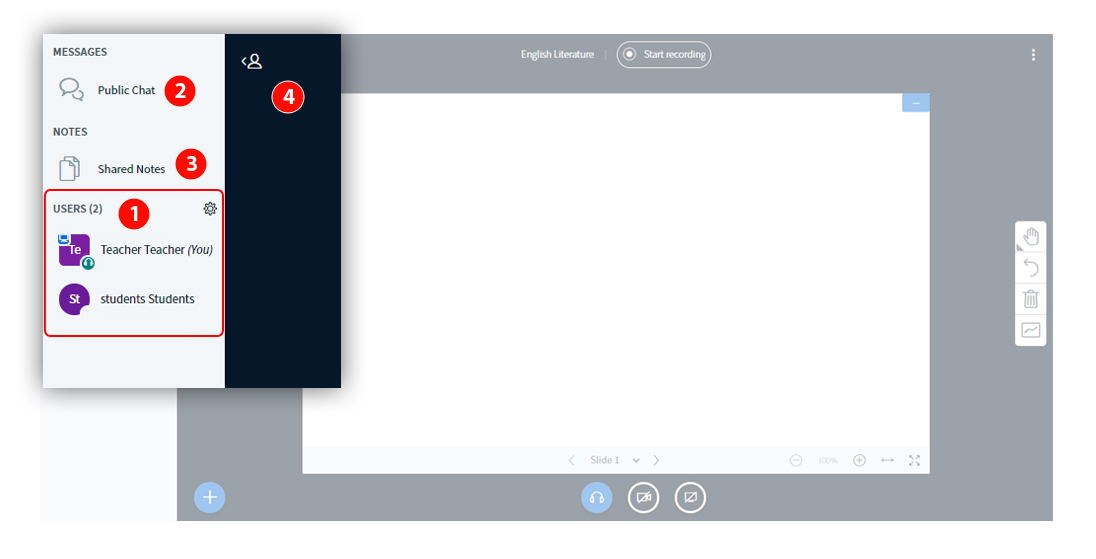
From the User Menu, you can view all the users in the classroom [1].
You can also chat with participants and contribute to shared notes. To open the chat,
click the Public Chat link [2].
To open the Shared Notes, click the Shared Notes link [3].
The User Menu is open by default.
To close the User Menu, click the User Menu icon [4].

View Presentation Window

VIEW PRESENTATION WINDOW 1

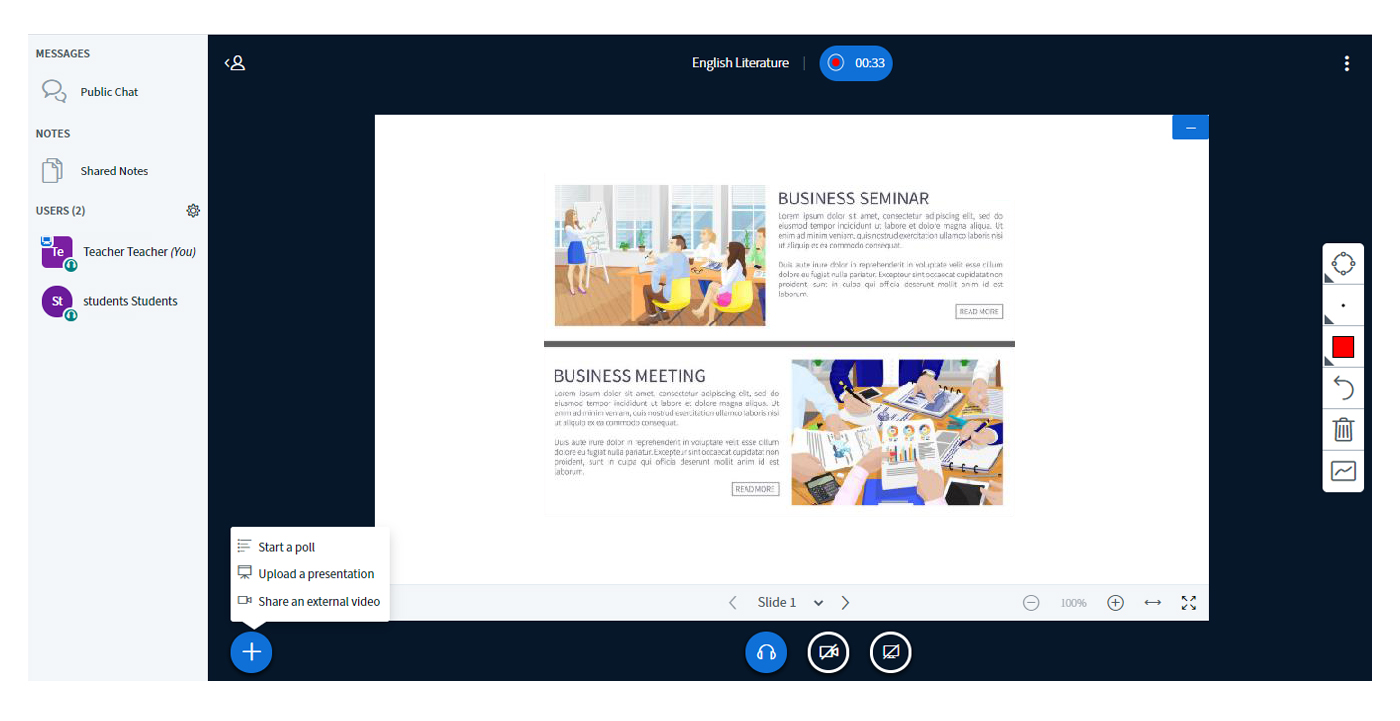
The Presentation Window displays the presentation that has been uploaded by the teacher or presenter. If the conference is being recorded, the recording time will display at the top of the screen.
The Presentation Window also includes several tools that control how you can participate in the conference.
To mute or un- mute your microphone, click the Microphone button.
To leave or join the conference audio, click the Audio button.
To enable your webcam, click the Webcam button.
If webcams are enabled, you can hide the presentation window and display only webcams by clicking the Hide icon.

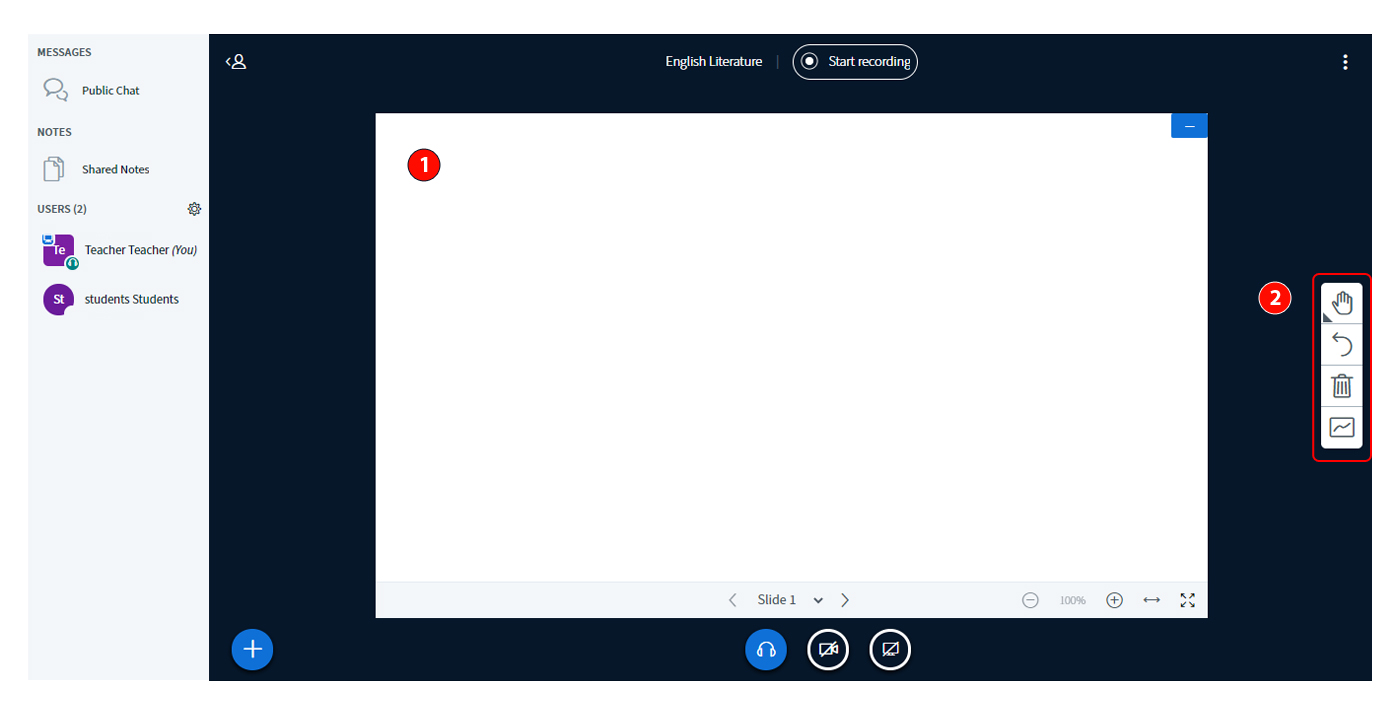
View White Board and Foot Note Tools

View White Board

1 – White Board

2 – Tools

Tools

If the teacher allows, participants can use tools to mark in the presentation window.
To use a pencil to draw in the presentation window, click the Pencil icon [1].
To view all annotation tools, click and hold the Pencil icon.In addition to the pencil tool, you can also
create text annotations [2], line annotations [3], or shape annotations [4].
To pan a document that has been zoomed in, click the Pan icon [5].
To adjust the thickness of an annotation, click the Thickness icon [6].
To adjust the colour of the annotation, click the Colour icon [7].
To undo the most recent annotation, click the Undo icon [8].
To delete all annotations that you have created, click the Delete icon [9].
Note: If you cannot view the annotation tools, they are not enabled for participants in your conference.

Open Option Menu

Open Option Menu

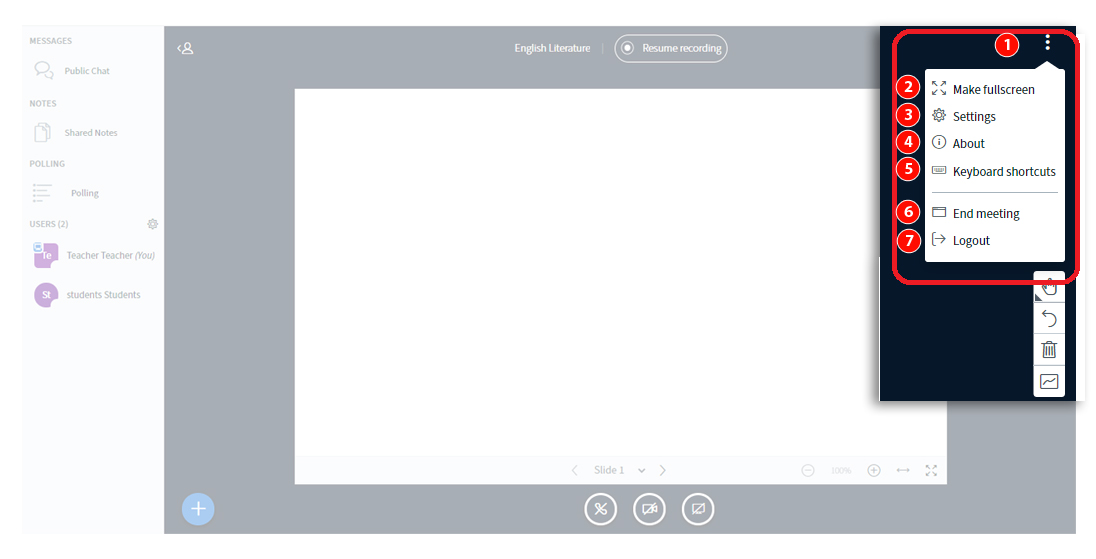
To open the Options menu, click the Options icon [1].
To view the conference in full screen mode, click the Make full screen option [2].
To view settings, click the Settings option [3].
To view information about the interface, click the About option [4].
To view Keyboard shortcuts, click the Keyboard option [5].
TO end this session click End meeting option [6]
To logout of the conference, click the Logout option [7].

View Setting Menu To

View Setting Menu To

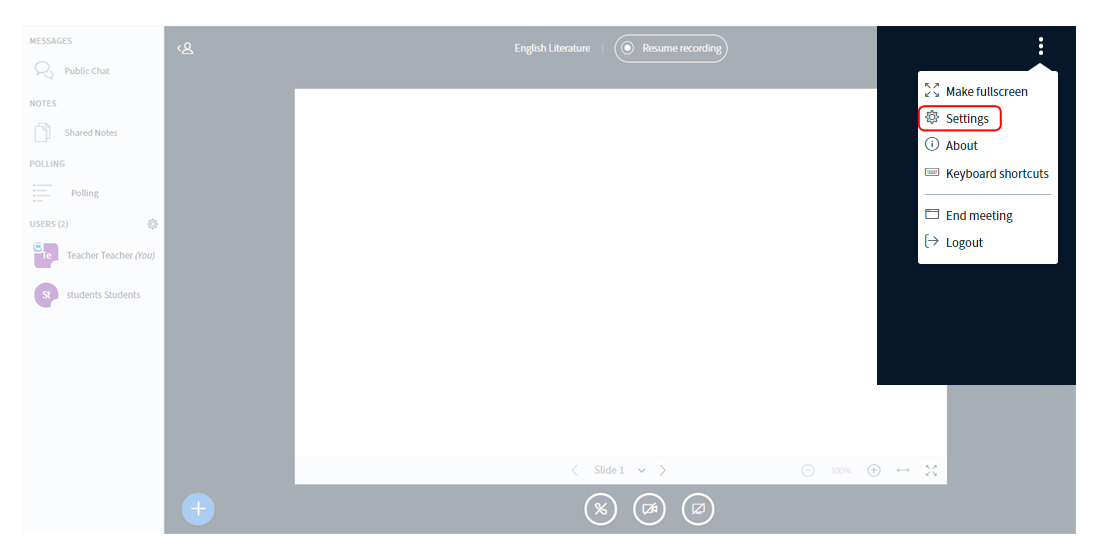
To open the Settings menu, click the Settings link.

Manage Application Settings

Manage Application Settings

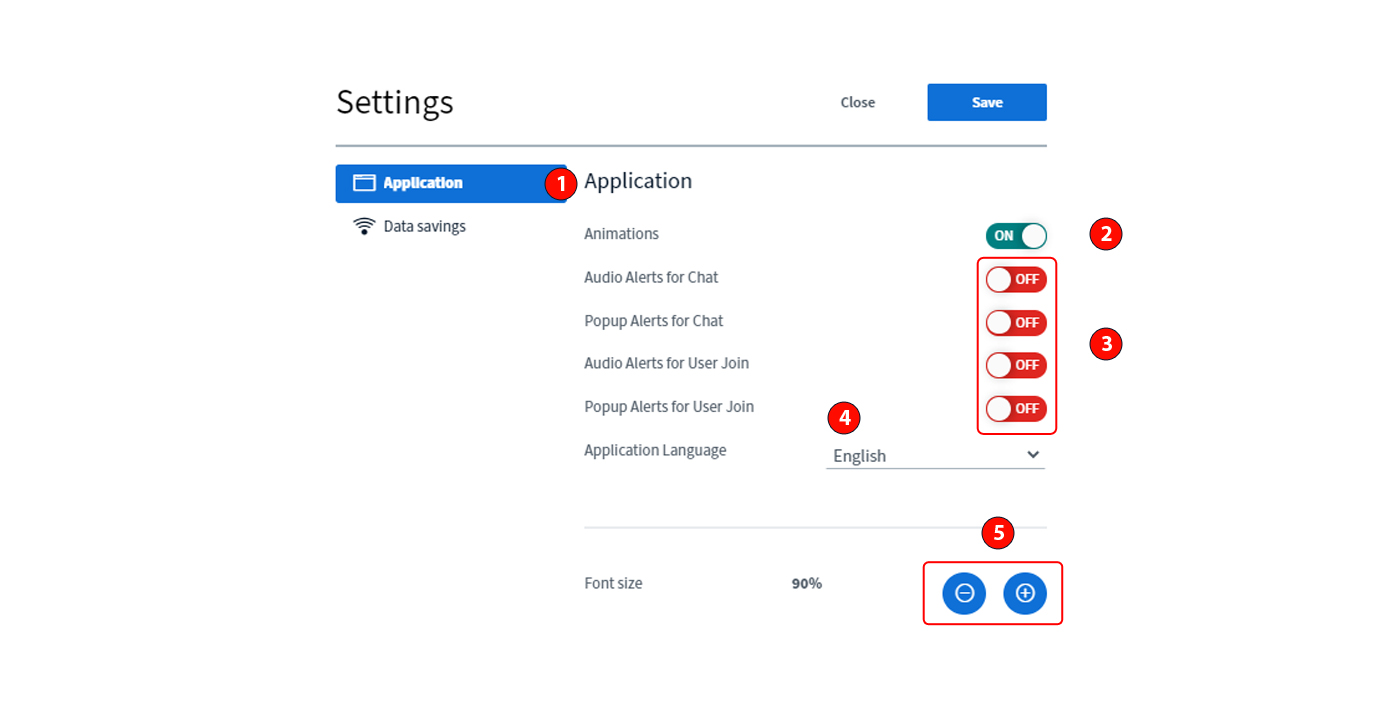
To manage applications settings, click the Application link [1].
To enable or disable animations that display when a user is speaking, click the Animations button [2].
To enable or disable chat alerts, click the Audio Alerts for Chat or Popup Alerts for Chat buttons [3].
To select a language for the interface, click the Application Language drop-down menu [4] and select the language. To adjust the font size, click the Decrease or Increase buttons [5].
Note: Chat alerts only function within the same browser in which the Conferences interface is open.

Manage Data Saving
To

Data Saveing

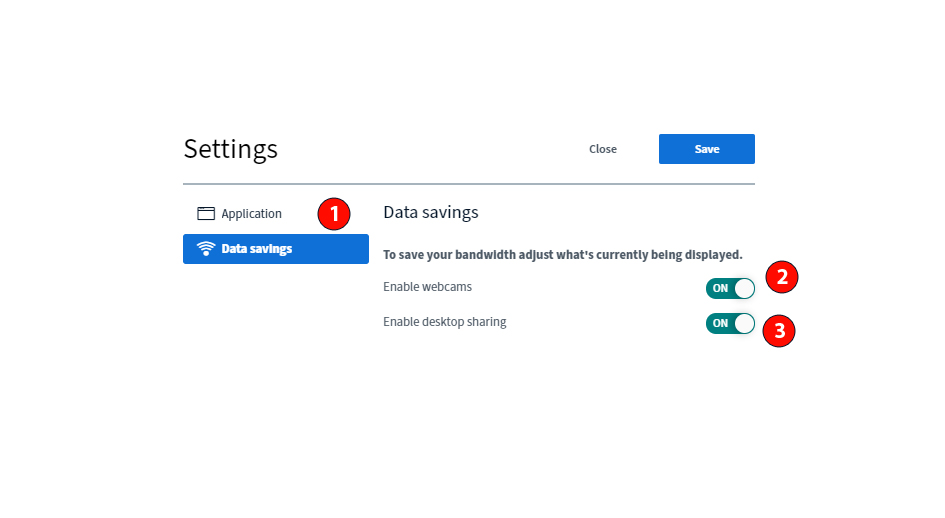
To manage data saving settings, click the Data savings link [1].
To enable or disable webcams, click the Enable webcams button [2].
To enable or disable desktop sharing, click the Enable desktop sharing button [3].

Ask for Demo
× Chat on WhatsApp